Monday, October 4, 2010

Oatmeal Brownies


Oh, don't turn away in horror because Shannon attempted brownies again. I could tell that last recipe was a disaster before I even made it. And I'm not even that good at baking.
This recipe is from Betty Crocker, and you know ol' Betty knows her way around a kitchen. I was a little nervous about the amount of butter these brownies call for--I set 911 on speed dial in case one of us went into cardiac arrest while consuming that much fat in one sitting.

Oatmeal Brownies

Crust and Topping
2 1/2 cups quick-cooking or old-fashioned oats
3/4 cup all-purpose flour
3/4 cup packed brown sugar
1/2 tsp baking soda
3/4 cup butter or margarine, melted

Filling
4 oz unsweetened baking chocolate
2/3 cup butter or margarine
2 cups granulated sugar
1 tsp vanilla
4 eggs
1 1/4 cups all-purpose flour
1 tsp baking powder
1 tsp salt

1. Heat oven to 350 degrees. Spray 13x9-inch pan with cooking spray.

2. In a large bowl, mix oats, 3/4 cup flour, the brown sugar and baking soda. Stir in melted 3/4 cup butter. Reserve 3/4 cup oat mixture for topping. Press remaining oat mixture in pan. Bake 10 minutes. Cool 5 minutes.

3. Meanwhile, in 3-quart saucepan, heat chocolate and 2/3 cup butter over low heat, stirring occasionally, until melted; remove from heat. Stir in granulated sugar, vanilla, and eggs. Stir in 1 1/4 cups flour, the baking powder and salt.

4. Spread filling over baked crust. Sprinkle with reserved 3/4 cup oat mixture. Bake about 30 minutes longer or until center is set and oat mixture turns golden brown (do not overbake). Cool completely.

The Verdict: Hello, fudge with a crunchy topping? Everyone was smiling like Lotus Eaters.

The brownie part was, by far, my favorite. If you like moist brownies, you'll like this recipe. And I am now dreaming of filling something fruity between the oat layers. I do still have a sugar pumpkin waiting to be used. Check back to see if these Oatmeal Brownies inspire me to create an oatmeal pumpkin bar. With the rate Noyan is eating these brownies, that could be tomorrow...

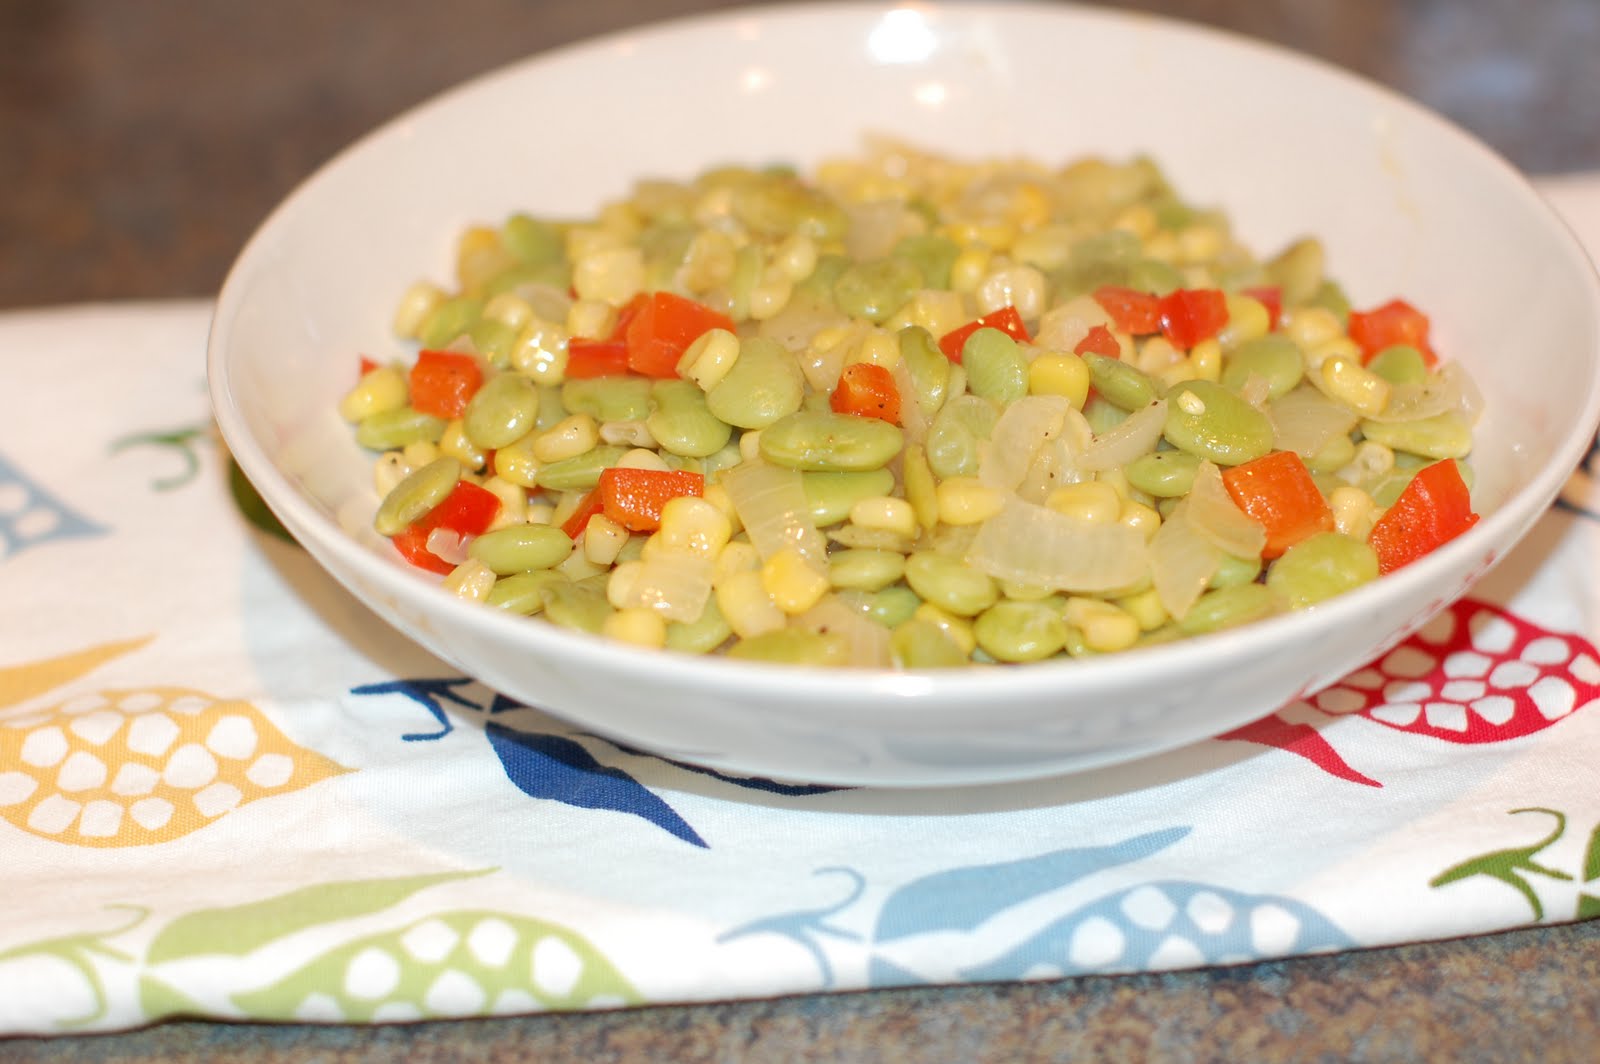


Succotash


"Sufferin' Succotash!" That's pretty much my familiarity with succotash; the exclamation of a cartoon cat. Hey, I grew up in Massachusetts. But since Paula Deen suggested it as the accompaniment to Salisbury steak, I figured I'd have a go at it. Yes, it has lima beans it in. And no, I don't particularly like lima beans. But I'm a grown up and tastes change.

Succotash

1 tbsp olive oil
1 cup chopped onion
1/2 cup chopped red bell pepper
1 (14-ounce) package frozen baby lima beans, thawed
2 tbsp butter
1 tbsp water
1 (12-ounce) package of frozen gold and white corn

In a large skillet, heat oil over medium heat. Add onion, bell pepper, salt and pepper; sauté for 4 to 5 minutes or just until vegetables are tender. Add lima beans, butter, and water; cook for 5 minutes, stirring often. Add corn, and cook 10 to 12 minutes, stirring often, or until beans and corn are tender. Serve immediately or at room temperature.


The Verdict: Lima beans taste like a drier edamame and I like edamame. So I like succotash.

Noyan liked it as well; it was the first thing on his dish that he tucked into. Amir, however, gave it the evil eye and (as you maybe read in the last post) used all of his energy attacking the Salisbury steak like a bird of prey.
In reading up about succotash, apparently there are two versions: this, with corn (and, oh, by the way...the original recipe calls for frozen gold and white corn--I just used corn) or with hominy. And, interestingly, succotash is an Native American word that means "boiled whole kernels of corn." So it sounds to me like the hominy version is the truer recipe, and according to some cooks, the better. Slow-cooked hominy brings out more flavor.

Not sure, folks, but I can say two things. First, I liked this recipe, and second, there was enough to freeze and eat again. So I'll have to report on hominy succotash in a future post.

Sunday, October 3, 2010

Salisbury Steak


When I saw this Paula Deen recipe, I was transported back to being a kid. I remembered the Swanson tv dinner that had the salisbury steak, mashed potatoes, corn and a brownie. The brownie always got overcooked and turned crispy, but it was still good. My mom was a great cook, so don't get any ideas that I was a latch key kid eating frozen meals alone in front of the Brady Bunch. I think the strongest memories of salisbury steak meals were snowy nights when my dad went out plowing and my mom didn't want to cook anything big for just the two of us, yet we still wanted something hot. So tv dinner it was.


Noyan wasn't familiar with salisbury steak. When he asked what dinner would be tonight and I told him, his reply was, "This blog you write is going to make us go broke." Little did he know that salisbury steak is just hamburger, formed into patties that sort of resemble steak, smothered in gravy. Instead of corn and potatoes, I made succotash. I even made brownies--but these weren't overcooked and crispy, I promise.


Salisbury Steak

2 pounds ground beef

1/2 cup dry bread crumbs

1 large egg, lightly beaten

2 tbsp Worcestershire sauce

2 cloves garlic, minced

1/2 tsp ground black pepper

1/4 tsp salt

1 (8-oz) package sliced baby bella mushrooms

2 tbsp all-purpose flour

1 (10 1/2 oz) can condensed French onion soup

1 (10 1/2 oz) can beef consommé

1. In a large bowl, combine ground beef, bread crumbs, egg, Worcestershire sauce, garlic, pepper, and salt. Form mixture into 6-8 (4 inch) patties. Heat a large nonstick skillet over medium heat.

2. Add patties to skillet, in batches if necessary, and cook for 7 to 8 minutes per side or until browned. Remove patties from pan; set aside. Reserve 2 tablespoons drippings in skillet

3. Add mushrooms to skillet, and sauté for 1 to 2 minutes or until just tender. Add flour and onion soup, and cook, stirring constantly, for 2 minutes. Stir in consommé.

4. Return patties to skillet; bring to a boil. Reduce heat, and simmer, uncovered, for 30 to 40 minutes or until patties are cooked through and sauce is thickened. Serve immediately.


The Verdict: I thought it was good, Noyan thought it was very good, and Amir thought it was great.

I would have given it a very good as well, but what I wasn't super bowled over by was the fact that the canned soups made it very salty. I just checked the Campbell's website and neither the French Onion nor the Beef Consommé come in a low-sodium version. (Please let me know if you come across another brand that sells either in a low-sodium option.) Otherwise, it was really good. Simmering the patties in the sauce took away both the hamburger taste and consistency and made it more like--well, steak.

Amir was the one who made Noyan and I both laugh. He ate his entire patty, including little crumbs of meat, then asked, "More?" As Noyan said, if he eats this much at 2, what's going to happen when he's a teenager? Luckily, this is a fairly inexpensive meal to prepare. Whereas last night we ate three patties, one went to work with Noyan for lunch, and the remaining four were frozen for another night's meal, in ten years Noyan and I will eat one and Amir will eat...the reamining six.


Saturday, October 2, 2010

Clafoutis aux Pêches


Almost two weeks ago, my husband bought about two pounds of peaches for me in the hopes that I'd make him some jam. I didn't get around to it, so this week he's been getting them in his lunchbox. But that's only so many peaches for so many days and there were many left, on the verge of going bad. What to do other than make jam?


So I was psyched when I found a Paula Deen recipe for something called Peach Clafouti. The picture looked great and the ingredients looked doable. I didn't have heavy cream but I did have half-and-half from the scones last week, so I figured that would do. Of course, the only question left was: what the hell is a peach clafouti? Having never heard of one before and having no one to talk to about it, I was saying it in my head to rhyme with football has-been Doug Flutie. I wasn't sure what a clowfoodee is supposed to look like, let alone taste like. But the main ingredient is fresh fruit, which means my husband will eat it, regardless.


Clafoutis aux Pêches


1 tbsp butter, softened

1/2 cup sugar, divided

2 cups peach slices

3 large eggs, room temperature

1 cup heavy cream

6 tbsp all-purpose flour

1 tsp vanilla extract

1/2 tsp almond extract

1 tsp lemon zest

1/4 tsp salt


1. Preheat oven to 350 degrees. Butter a 10-inch baking dish; sprinkle with 1 tablespoon of sugar evenly over bottom and sides of dish. Arrange peaches in a concentric circle over bottom of prepared dish.


2. In the container of a blender, add eggs, cream, flour, extracts, zest, salt, and remaining sugar; process until well blended.


3. Pour batter over peaches and bake for 40 to 45 minutes or until golden brown. Serve warm or at room temperature.


The Verdict: First a story, if you'll allow me, s'il vous plait.


So I prepare my clowfoodee in the midst of my crazy poulet et pommes de terre, slightly worried that half-and-half wouldn't work like heavy cream. I poured my batter over the peaches then had to return the dish to the fridge as the chicken wasn't ready to vacate the oven. Oh great, I'm thinking, especially as the peaches start to pop out of the batter. Finally, the dish goes in the oven and cooks.


When I pull it out, it is not cake-looking like the Paula Deen picture, but shiny. The toothpick came out clean, so I knew it was cooked. Still, Noyan walked by and said, "That looks good!" I let it sit for a while then served it. We sat eating what appeared to be peaches baked in custard. It tasted wonderful, but this wasn't clowfoodee. So I momentarily thought: just lie. Write in the blog that you made peaches baked in custard on purpose.


Before blogging about the chicken last night, I decided to do a little research into clowfoodees. And wouldn't you know, it's actually a French dessert. I learned from Wikipedia that outside of France it's often called a Clafouti, where in France it's a Clafoutis. (Ah, so it's not a clowfoodee.) It's traditionally made with cherries, but lots of other fruits are often used. So I checked in with Julia and voilà! there under fruit flans is not one but seven recipes for Clafoutis. Which leads to the absolutely amazing part--my peaches baked in custard was actually more authentic than the cakey looking picture! HA!


So, The Verdict: Easy, creamy, not cloyingly sweet. And the perfect dessert pairing to a French meal.

Pommes de Terre Sautée or Pan Fried Potatoes

These are the potatoes that went with the roast chicken from last night, or part two of freaking fussy French food. The recipe that appears in Mastering the Art of French Cooking describes the superior potatoes you'd get if you were living in France, potatoes that are just the absolute perfect shape and size for dancing around merrily in a pan. We, of course, don't have these potatoes here in the United States. So Julia suggests whittling down a bunch of new potatoes into 2 inch long by 1 inch wide olive-shaped to masquerade as pommes de terre de Hollande.

I was just going to cut my potatoes into cubes and not bother to even peel them. But authenticity got the better of me, so I spent a good amount of time peeling small potatoes, cutting them in two, then carving them down into a new shape.

Pommes de Terre Sautée or Pan Fried Potatoes

2 lbs new potatoes
2 tbsp butter
1 tbsp olive oil
1/4 tsp salt

1. Cut potatoes into 2" x 1" olive shapes. Dry well with a paper towel.

2. In a skillet with a cover, add butter and oil to skillet to film it by 1/16 inch and set over moderately high heat. When butter is very hot but not turning color, put potatoes into skillet. Leave them for 2 minutes, regulating heat so butter is always hot but not coloring. then shake the skillet back and forth to roll the potatoes and to sear them on another side for 2 minutes. Continue thus for 4 to 5 minutes more until the potatoes are a pale golden color all over, indicating that a seared, protective film has formed over them, so that they will not stick to the pan. Then sprinkle the potatoes with salt and roll them again in the skillet.

3. Lower heat, cover the skillet, and cook the potatoes for about 15 minutes, shaking them every 3 to 4 minutes to prevent their sticking to the skillet, and to insure even coloring. They are done when you can pierce them with a fork.

4. Sprinkle potatoes with minced parsley, chives, fresh tarragon or a mixture of fresh green herbs.

The Verdict: I hate to admit it, but the extra effort was worth it. These potatoes are delicious.

The wood-working skills you employ to shape the potato really does allow for all-over browning; almost like a gigantic homefry. The recipe suggests more butter at the end of cooking but I say don't; you're using plenty to cook them. Also, I didn't have any fresh herbs, so I sprinkled mine with about a 2 teaspoons of Herbes de Provence.

These potatoes probably aren't for your average weekday meal side dish. It's too much effort. But if you're planning a go-all-out meal, dig out this recipe. They're definitely impressive.

Friday, October 1, 2010

Poulet Rôti or Roast Chicken


I have a very active two-year-old. I write that and kind of snicker as "active" is an understatement. I'm pretty sure that somewhere in his ancestry, he shares genes with the Roadrunner from Bugs Bunny cartoons. On any given night, I'm so exhausted from chasing him around that frozen dinners would be not only understood, but readily forgiven by anyone who observes Amir. But I love to cook. However, Mastering the Art of French Cooking on your average Friday night is a little punishing.

I've mentioned in an earlier post about Turkish cooking that it is very much like French cooking: simple ingredients and simple food but labor-intensive when done right. This meal is very French--roast chicken and pan fried potatoes. Sounds simple, right? Wrong. I'd like to dedicate this meal to Bob the Builder, with a special shout out to Rolly. Thanks to a 40-minute episode, my family was able to enjoy poulet rôti, pommes de terres sautées and clafoutis pêche. That's all prep time. Between bastings and skillet shakes, we busied ourselves playing cars on the kitchen floor.

I've separated this meal into three different posts: chicken, potatoes and dessert. So let's get crackin' on how Mrs. Julia Child and Mrs. Shannon Kinayman together prepare a chicken, shall we?


Poulet Rôti


1 whole ready-to-cook roasting chicken (about 3-4 pounds)

1/2 tsp salt, divided

4 tbsp softened butter, divided

1/3 bag baby carrots

1 small onion, quartered

1 tbsp olive oil


1. Preheat oven to 425 degrees. Sprinkle the inside of the chicken with salt and smear in half the butter. Dry it thoroughly, and rub the skin with the rest of the butter.


2. Place the chicken breast up in the roasting pan. Strew the vegetables around it, and set it on a rack in the middle of the preheated oven. Allow the chicken to brown lightly for 15 minutes, turning it to the left side after 5 minutes, on the right side for the last 5 minutes, and basting it with a mixture of 2 tablespoons of melted butter and one tablespoon of olive oil after each turn. Baste rapidly so the oven does not cool off.


3. Reduce oven to 350 degrees. Leave the chicken on its side, and baste every 8 to 10 minutes, using the fat in the roasting pan when the butter and oil are exhausted. Regulate oven heat so chicken is making cooking noises, but fat is not burning.


4. Cook between 1 hour and 10 minutes to 1 hour and 30 minutes. A done chicken will register at 180 degrees when a meat thermometer is stuck into the breast (making sure not to touch the bone).


The Verdict: Don't hate me because I didn't invite you to dinner. And despite needing a massage and a good night's sleep after all that popping in and out of the oven, it was well with it for a juicy, moist and beautifully browned bird.

There's actually more to the Julia Child recipe, including making gravy. Gravy is great, but I'm the only one who eats it in my family, so it's a step I skip. There's also lots of stuff about doneness; spluttering fat and yellow juices. Hello, it's 2010. Buy a meat thermometer. Also, there's a lot about trussing the chicken. Trussing helps the bird to keep its shape while cooking, but it also doesn't allow the entire bird to brown evenly. Some will even argue that it doesn't allow for uniform doneness. So truss, don't truss. It will taste the same.

Now, here's my confession. I'm not very happy about tonight's level of browned skin. One side was lovely, one side...um, wasn't. That would be because while goofing with the timer on the oven, I shut the oven off for a short period during the 425 degree phase. The oven was hot enough to cook the meat, but not intense enough to brown the skin. So at the end, I basted the bird again, set it on its side and set it to broil for about 3 minutes. Julia wouldn't approve, I'm sure, but in a pinch, it works.


Buttered Toast Crispy Fishwiches


While cooking this dish the other night, I was thinking about people who don't like fish. I'm sure, in part, the reason I like it so much is because I grew up in New England. Fish like haddock and cod, as well as lobster are easy to get, not to mention fresh. I think I took that fact for granted until my dad and stepmother moved to Florida. They missed haddock miserably and were excited to find a local restaurant that served fish n' chips from haddock flown in every Friday.


This sandwich comes from Everyday With Rachel Ray and it doesn't answer, "Yeah, so, I live where cod is hard to come by...what now?" For those of you who want to make this recipe but are a little worried about where to get the fish, I'd suggest using frozen fillets. Check your local Trader Joe's if you have one around; they claim that their fish is flash frozen right on the boats. This recipe calls for cod; you can use haddock and it will work just as well.

Buttered Toast Crispy Fishwiches
4 tbsp butter, melted
1 1/2 cups panko breadcrumbs
1 tbsp Old Bay Seasoning
1 tbsp onion powder
1 tbsp garlic powder
Grated peel of one lemon
A couple of tbsp chopped fresh thyme
A couple of tbsp finely chopped fresh chives
4 pieces of cod (6 oz each)
Salt and pepper
Flour, for coating
2 egg whites, beaten
4 sandwich sized English muffins, toasted and lightly buttered

1. Preheat oven to 425 degrees. In a bowl, pour the melted butter over the panko and work it into the crumbs to evenly distribute. Season with the Old Bay, onion powder, garlic powder, lemon peel, thyme and chives.
2. Season the cod with salt and pepper, then coat in the flour, egg whites and panko mixture. Arrange on a broiled pan or a cooling rack placed on a cookie sheet (spray the cooling rack with Pam). Bake until deeply golden and crisp, about 20 minutes.
3. Place the English muffin bottoms on a work surface. Dress the slices with whatever you like--cole slaw, lettuce, bread and butter pickle slices, sweet relish, onion, lemon juice or malt vinegar. (Or all of it.) Place a piece of fish on each and top with the remaining muffins.

The Verdict: I haven't been on for a few days. That's because this was so good, we're eating it every night from now on and the blog is finished. Thanks for reading. Bye.

Of course, I'm kidding but these sandwiches were really, reeeeally good. Make sure to serve them fresh out of the oven so that the coating stays nice and crispy. Cooled fish still tastes good, but part of the charm is the crispiness.

The original recipe is a bit specific about how to top the sandwich but seriously, whatevs. Do what tastes good to you. Between you, me and the lamppost, we topped ours with sweet relish and slices of cheese. Rachel doesn't mention anything about cheese. So sue me. Also in the original recipe, it calls for fresh thyme and lemon peel. I didn't have fresh thyme, so I used about a teaspoon of dried and it came out just as well. Nor did I have a lemon, so I used dried lemon peel which you can find in the spice aisle.

Another suggestion, which to the kitchen master is a "no duh": when dunking your fish from flour to egg to panko, set up an assembly line. One next to the other. If you don't, you make a mess. I'm not a kitchen master and used to do it pell mell all the time. A giant mess ensues. Which also reminds me: this recipe uses lots of dishes. If you pop things into the dish washer as you go, or into a sink of hot, soapy water, you can enjoy your dinner afterwards instead of grumble about the disaster in the kitchen waiting.

By the way, I think the picture for this recipe doesn't do it justice at all. It looks bland and brown. Don't judge the sandwich from the picture. Trust me, you'd rather me cook you dinner than take your family photo.