Wednesday, August 3, 2011

Tangy Meatloaf Burgers

I love meatloaf.

I don't know if I'm supposed to though.  While it is a quintessential American comfort food, it's also equated with mystery meat and gauche cuisine.  But I think when it's done right, it's moist, tasty, and filling.  What's not to love?

My son loves meatloaf as well, not surprising, as it's, well, meat.  I do need to be careful about how creative and sneaky I get when it comes to ingredients, of course.  That boy can spot "relatively healthy" from ten miles away.  So when I saw this recipe in Food Network Magazine, I was psyched.  It can be made with meatloaf mix or with ground turkey.  Since we're a pretty pork-free home, we went the turkey route.  And they suggested a bunch of toppings but I didn't bother.  Not that they didn't sound great, but why waste the effort when the Little Critic would just toss them to the wayside?  But meatloaf with a yummy sauce between bread?  I'm in.

Tangy Meatloaf Burgers

1 small onion (1/2 sliced into rings, 1/2 diced)
1 pound meatloaf mix (ground pork, beef and veal) or ground turkey
1/4 cup fresh parsley, chopped
1/2 cup breadcrumbs (preferably panko)
1 large egg
1 tsp sweet or smoked paprika
1/3 cup ketchup
1/3 cup duck sauce (substitute 1/3 cup orange marmalade or peach preserves mixed with a splash of water if duck sauce is unavailable)
salt and pepper
4 rolls

1.  Preheat a grill to medium high.  Soak the onions rings in a bowl of cold water to keep them crisp.  Meanwhile, combine the meatloaf mix with the diced onion, parsley, breadcrumbs, egg, paprika, 1 tbsp each of ketchup and duck sauce, 1 tsp salt and 1/2 tsp pepper.  Gently form into four 1-inch-thick patties; make an indentation in the middle of each.

2.  Brush the patties with olive oil and grill until marked on the bottom, about 6 minutes.  Meanwhile, mix the remaining ketchup and duck sauce in a small bowl for brushing; set aside.  Turn the patties, brush with the ketchup mixture and continue grilling until cooked through, about 5 more minutes. 

3.  Spread buns with remaining ketchup mixture.  Drain onion rings.  Serve patties on buns with onions.

The Verdict:  Hello, my name is Chef Blunderbutt and I'm just going to toss random crap into ground meat, type it up as a recipe, and have a magazine print it, mmmkay?

It wasn't gross, but it was...busy.  You've got very herbal fresh parsley, the smoky taste of paprika (if you went the smoked paprika route), and because I wasn't buying a jar of duck sauce only to use a quarter of it, orange marmalade.  It's a bit of an arbitrary mix that just doesn't quite marry in the end. 

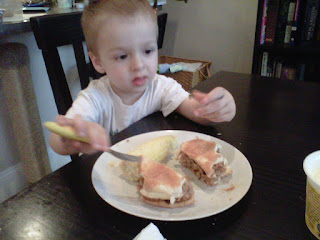
My poor son sat down at the table and announced, "I'm excited!" for dinner, thinking when I said burgers I meant those beef things between bread that don't taste like a helter-skelter sandwich.  But to be honest, his vanishing passion had less to do with taste and all about finding greens in his meat.  I was able to photograph the downward spiral of the meal:

And so goes dinner with this child.

Sorry so blurry, but here's Amir digging into his burger

 
He now discovers the offending green
Now the burger must be dissected to remove any and all parsley


The two things that I did learn from this recipe were the two tricks they included. The first is putting onion slices in cold water. I couldn't believe how nice and crisp they were in the burger. The other was making the indentation in the center of the burgers before cooking. You know how burgers swell up and look like meatballs instead of patties sometimes?  Making this well keeps them flat.

So I'm not sure if it was just my taste buds, but this meal didn't do it for me.  Let me know if you try it out and get a different result.  Maybe marmalade/paprika/parsley really is a great idea.


Tuesday, August 2, 2011

Warm Shrimp and Watermelon Salad

I think I have a fantastic television show pitch. 

There's Man Vs. Food, where the guy travels the country stuffing himself on greasy fare.  I'm suggesting Preschooler Vs. Food, where Amir, my 3-year-old, travels the country meeting people who cook for him.  The challenge is to find the people and foods that he'll eat.  Because I'm stumped, folks.

Yesterday I thought I had cooked the epitome of kid-friendly food.  As I was preparing it, the Little Critic danced excitedly in anticipation for lunch.  This salad features watermelon (which we eat at least two whole ones a week during the summer), cucumber (a vegetable I can count on him eating) and shrimp (a seafood he's been eating since before the Academy of Pediatrics recommended age).  It also has feta which he isn't wild about, but I could leave that off of his, along with the offending green dill.  Perfect, right?

Warm Shrimp and Watermelon Salad

4 whole-wheat pitas, cut into triangles
2 tbsp extra-virgin olive oil
16 medium to large shrimp, shelled and deveined
1/2 cup sliced shallots
4 cups cubed seedless watermelon
1/4 tsp salt
1/4 tsp fresh ground pepper
2 large cucumbers, peeled and chopped
2 oz crumbled feta
2 tbsp chopped fresh dill

1.  Heat oven to 450 degrees.  Toast pita bread until brown and crispy on a cookie sheet, turning once, 3-5 minutes per side.

2.  In a large skillet, heat oil over high heat.  Cook shrimp and shallots, stirring until shrimp is pink and shallots are crisp, 2 to 6 minutes, depending on size of shrimp.  Transfer to a bowl.

3.  In the same skillet, add watermelon and 1/4 cup water over high heat, stirring, until liquid becomes syrupy, about 3 minutes. 

4.  Remove skillet from heat; add shrimp mixture, salt and pepper; stir.  Divide shrimp-watermelon mixture among four plates; add cucumber and feta.  Sprinkle with dill.  Use syrup that collects in skillet/bottom of mixed bowl to drizzle salad.  Serve with toasted pita bread.

The Verdict: I thought I had died and gone to heaven.  My husband gave it four out of five stars (his food rating system).  And the Little Critic...

...hated it.

What?!  Before lunch, he was begging to eat the watermelon and the cucumber.  Yet all together, he didn't like "the red stuff" and swore he didn't like cucumbers.  So he ate shrimp and toast.  Imagine me.  Now imagine me shaking my head in frustration.  That's what I'm doing while I write this.

Ignoring my son's comments, this salad is good stuff.  I'd never heard of cooking watermelon before, but when you do it becomes even sweeter, then sweeter still when paired with a bit of salt and the salt in the feta.  Then when you mix slightly crispy shallots with those watery summer foods?  My mouth is watering thinking about it.  An added bonus: fairly quick to whip up.

If you have a nice backyard with a patio set you can serve food on, buy yourself a good chillable wine, invite friends over, make this dish, and become their hero.  Seriously.  They'll think you're a genius. 

Here's hoping the "I hate everything" stuff is a phase for the Little Critic.  Because if you don't think this is the definition of yummy, I don't know what to say.

Sunday, July 31, 2011

Veggie Lentil Loaf

Need a recipe for Meatless Monday?  It's not just meatless but vegan and gluten-free to boot!

A couple of months back I kept running into recipes for vegetarian versions of meatloaf.  They all sounded so delicious but the ingredients weren't practical for me.  Egg replacers, textured vegetable proteins, nutritional yeast...I don't have a problem with any of these items, I just wouldn't use them again in the immediate future.  And being as frugal as I am, I couldn't justify these purchases for one recipe.

But alas! The April/May issue of Kiwi included a recipe for veggie lentil loaf.  Not only were the ingredients "everyday" foods, but things I had in my own refrigerator and pantry.  And it called for French lentils.  I love lentils, but those lovely little lentils are nothing like their khaki cousins.  They're tiny and speckled, keep their shape and are firmer, and have much, much more flavor.  I changed a couple of things, but mainly, it's the same recipe.

Veggie Lentil Loaf

2 1/2 cups French lentils, rinsed and picked over
2 tbsp olive oil, plus more for greasing the pan
1 large yellow onion
2 green bell peppers, seeded and diced
4 cloves garlic, minced
1 tbsp plus 1 tsp cumin
1/4 cup tahini
zest and juice of 1 lemon
2/3 cup white rice flour
salt and pepper
1/4 cup vegan barbecue sauce (I highly recommend Annie's Naturals Organic Smoky Maple      BBQ Sauce)

1.  Place the lentils in a medium saucepan, and fill the pot with enough water to cover the lentils by 2 to 3 inches.  Cover, bring to a boil, and simmer for 25 minutes or until the lentils are tender.

2.  While the lentils cook, prepare the vegetables.  In a large skillet, warm the olive oil over medium heat.  Add the onions and sauté 5 to 7 minutes, or until soft and translucent.  Add the peppers and cook 5 minutes more.  Add the garlic and cumin, and cook 1 minute more.

3. Transfer the vegetables to a food processor and pulse until very finely chopped.  Place in a large bowl and set aside. 

4.  Add the cooked lentils, tahini, and lemon zest and juice to a food processor and process until mostly smooth.

5.  Add the lentil mixture to the vegetables and stir to combine.  Fold in the rice flour and season the mixture with salt and pepper to taste.

6. Lightly grease two 9-by-5-inch loaf pans and spoon the mixture into it.  Use a spatula to smooth the top.  Bake in a 350 degree oven for 40 minutes, or until the top of the loaf is just beginning to brown.

7. Remove the loaf from the oven and spread the barbecue sauce over the top.  Bake for another 15 minutes at 400 degrees, then allow the lentil loaf to sit for at least 10 minutes before slicing.

The Verdict: And the cheese stands alone.  I thought it was super and my husband and son thought it was Torture in a Loaf Pan.

They didn't hate it that much, but nor were they jumping for joy.  In their defense, I guess lentils aren't everyone's bag.  Favorite foods are often described as moist, juicy, succulent...and a lentil can't ever snag one of those adjectives.  Even the fancy French ones are dry.  And no matter how many vegetables and spices you add, or how much you whir the ingredients around in a blender, they don't magically become meat.  Which is a mean slight of hand trick to meat lovers.

But let's ignore them, shall we?

The original recipe calls for a single loaf pan.  Unless I fell asleep at the stove, which is entirely possible in my new baby state, this recipe makes a humongous amount of lentil mixture.  No worries as it freezes well.  It also called for ketchup instead of barbecue sauce.  Meh.  I thought, because lentils aren't quite as tasty as ground meat, it called for a little something extra.  But if you prefer ketchup, knock your socks off.

Now, speaking of this recipe making a boat load of lentil mixture--you are faced with a bit of a conundrum if you don't have a food processor and use a blender.  Yes, for all the cooking I do, I don't have a food processor.  Crazy, right?  But if you're a poor soul like myself, you'll have to blend your foods in batches.  Lots of batches. 

If you're a safe cook, the two items that might seem a little outre are rice flour and tahini.  Whole Foods generally sells rice flour by the pound, so you could potentially buy just a bit if you have one near you.  Otherwise, regular white flour would work, I imagine.  It just wouldn't be gluten-free anymore.  If you were to buy a larger amount, you can use the rice flour in rice pudding.  It's how my husband makes it and now that I write it, I'll have to get that recipe for you all.  As for tahini, it's great to have on hand to make homemade hummus.  There is nothing easier or more delicious than homemade hummus.  Substituting it might be a bit tricky; it's a bit like nut butters (almond, cashew) but if you don't have tahini, you probably don't have nut butters laying around.  Peanut butter is a possibility, but peanuts are fairly strong.  I can't guarantee how much it would change the taste.

If you're a fan of lentils and enjoy lots of vegetables, I think you'd love this recipe.  If you're feeding it to serious carnivores, don't even try to sell it as meatloaf.  It's nothing like meatloaf.  And even your honesty might not convert the meat lover.  Don't tell me you weren't warned.

Friday, July 29, 2011

Italian Sausage and Squash Soup

There really is something to this decluttering thing, isn't there?

I was going through a massive pile of papers on our computer desk, trying to see what I could toss, when I came across a whole cache of recipes.  Not just recipes, but recipes I made during my baby's newborn months that I never had time to share with you all.  This means that, unfortunately, most of them don't have pictures.  (But if I make these recipes again, I'll edit these posts and add pictures.) 

The first recipe I found--Italian sausage and squash soup from Cuisine--was lovely, easy enough to make, and perfect for freezing.

Italian Sausage and Squash Soup

1 lb bulk Italian sausage
2 tbsp olive oil, divided
1 1/2 cups diced onion
2 tbsp minced garlic
1 1/2 lbs butternut squash, peeled, seeded and cut into 1-in chunks
1/4 tsp red pepper flakes
2 cups low-sodium chicken broth
2 cups water
1 cup diced red bell pepper
1/2 cup heavy cream
1 tsp ground dried sage
1 tsp sugar
2 cups packed baby spinach
3 tbsp brandy
   salt and pepper to taste

1.  Brown the sausage in 1 tbsp oil in a skillet over medium-high heat until cooked through.  Drain on a paper towel-lined plate; set aside.

2.  Sweat onion and garlic in remaining oil in a large pot over medium heat until soft, 5 minutes.  Increase heat to medium-high, add squash and pepper flakes, and sauté 5 minutes.

3.  Stir in broth and water, bring to a boil, and simmer until squash is very soft.  If using frozen squash in a bag, just add squash, broth and water to the pot and bring to a boil.

4.  Purée soup with a handheld blender (or in batches in a standard blender), then add bell pepper, cream, sage, and sugar; simmer until bell pepper is tender, about 5 minutes.  Stir in spinach, brandy and sausage, and simmer until spinach wilts and sausage is heated through, about 2 minutes; season with salt and pepper.

The Verdict:  This soup is amaaaazing.

The flavors and mouth-feel of this soup are wonderful.  Puréed butternut squash with cream is so velvety, the sugar and onions are slightly sweet, and the sausage and red pepper flakes give the soup just enough spice.  And adding brandy to foods is always a win; it's both hot and sweet with a little hint of wood.  In other words, there's lots of good stuff going on in this soup.  It's also so thick, it's nearly a stew.

I was really curious to see how my 3-year-old would react to it.  The taste doesn't scream vegetable and the color could easily be from cheese.  He had also helped me to pick out the red bell pepper, a vegetable up until the last couple of weeks he was friendly with.  He took a bite of the soup and looked skeptical; he knew someone was pulling the wool over his eyes.  But he ate nearly half the bowl before announcing that he didn't like it.  Since it wasn't an all-out visceral response followed by a dinner battle, I think it's worth trying again with him.

This would be a perfect fall food, especially with squash picked up from a farmer's market.  Serve it alongside some thick biscuits and butter and you've got yourself cozy in a bowl.  Yum.

Tuesday, July 26, 2011

Buffalo Ginger Stir Fry

A couple of weeks ago, we had some family come over for a barbecue.  Before they arrived, my husband went to the supermarket to pick up a couple of things and had texted me to make sure we had enough meat.  We did, but I didn't see the text in time, so he came home with a buffalo sirloin steak, just under a pound that went immediately into the freezer.

Now, I've been known to menu plan, get busy, and let meat go bad.  Not often, but often enough that my husband tends to keep a close eye on stray foods.  The buffalo steak was no exception.  Nearly every day I was reminded that it was there.  And every day I reminded him that it was safe in the freezer.  Yet I knew that he would sleep better at night after it became part of a meal.  But what can you do with one steak?

In my previous life, i.e. my life before children, this would have been an easy question to answer.  Meat should be an accompaniment to foods, not the star of the show.  And a good way to do that is with a stir fry.  Then enter Mr. Finicky, our 3-year-old, who eats meat like a little blond T-Rex and can see microscopic bits of green from across the room.  Oh boy, this might prove to be difficult.  So instead of wasting my time with too many vegetables, I made a stir fry with edamame and bok choy.  I knew he'd eat the edamame and I figured I'd give the bok choy a shot.  You can substitute the vegetables with anything you like.

Buffalo Ginger Stir Fry

3/4 cup beef broth
2 tbsp honey
1 tsp ginger
1 tsp minced garlic
1 tsp sesame oil
2 tsp vegetable oil, separated
1 lb buffalo steak, cut into small, thin strips
1/2 bunch bok choy, chopped
1/2 pkg frozen edamame, cooked according to package directions
1 tbsp cornstarch
1/2 cup water
rice or noodles to serve with

1. Combine the broth, honey, ginger, garlic and oil in a sealable container and shake vigorously, then set aside. 

2.  Heat one teaspoon of the vegetable oil in a wok then sauté buffalo until cooked through, about 4 minutes, then set aside.

3.  Heat the remaining vegetable oil and sauté the bok choy until greens wilt, about 2 minutes.  You may wish to remove the greens and let the whites of the bok choy sauté until they become more tender, approximately an additional 4 minutes.  Add cooked edamame and sauce.

4.  Once sauce is simmering, combine cornstarch and water, mix well, and add to the wok.  Cook until the sauce thickens, about 2 minutes.  Serve over rice or noodles.

The Verdict: Good but not great.

As I guessed, my son ate everything except the bok choy which he refused to even try.  (So much for my "you must try at least one bite" rule.)  He had no complaints.

My husband and I didn't have any serious complaints either, other than buffalo is the wrong meat for this dish.  I'm not a fan of stir fried beef, period, as I think it makes the meat too tough.  But I liked the sauce and the combination of veggies.  I would have preferred it with chicken or tofu.  My husband felt that buffalo was an unorthodox meat for this kind of dish.  He felt that the flavor difference from beef was the wrong combination.  (I don't find there's much of a difference in taste, per se.  I feel like buffalo is just a "better" version of beef.)

So could I have found a better use of that buffalo?  Probably.  Honestly, the best use would have been to buy a second steak and eat it Amir (my preschooler dinosaur) style.  Grilled medium, paired with mashed potatoes.  Sometimes simple is better.

Sunday, July 24, 2011

Shrimp and Feta Pizza

I love to cook.  That's pretty obvious because of this blog, right?  But at the risk of going all Are You There God? It's Me, Margaret, sometimes cooking for a picky 3-year-old can be a drag.  I think the most disappointing part is that while I haven't submitted my application for traveling food freak should the Weird Foods host up and quit, I'm a fairly adventurous eater.  So when my son started solid foods, I made my own baby food so that he could experience good cuisine at an early age.

How on earth did I end up with a child whose culinary daring doesn't wander far beyond edamame and salmon?

I'm probably grumpy because dinner, aside from Mr. Finicky's exclamations of "I don't like...!" fifty-seven times during the meal, was fairly disastrous.  We love homemade pizza in our house, so it was par for the course for me to make my own pizza dough in my bread maker.  But a crying baby and high humidity created a finished dough ball that was more ectoplasm than pizza.  This was remedied with a mad dash to Whole Foods for pizza dough.  (I ended up getting their multigrain dough and it's fantastic, by the way.)  And my need for Hooked on Phonics created the second dinner debacle: overlooking the word "grilled" in the recipe.  We have a community grill at our condo, but the hurdles to grilling more than steak are limitless. 

So what happened?  I'll share with you the recipe I made, not what I was supposed to make.

Shrimp and Feta Pizza 

3/4 lb medium shrimp, peeled and deveined
1 onion, sliced into rounds
1/2 cup extra-virgin olive oil, plus more for brushing
1/2 tsp dried oregano
salt and pepper
1 lb prepared pizza dough at room temperature
1 cup cherry or grape tomatoes, halved
1/2 cup crumbled feta cheese

1. Move oven rack to lowest level in the oven and preheat to 500 degrees F.  Toss shrimp and onion in a bowl with olive oil, oregano and salt and pepper.

2.  Stretch pizza dough onto a pizza pan and brush the outer crust with olive oil.  Bake in the heated oven for 5 minutes.  Meanwhile, cook shrimp and onions in a skillet sprayed with cooking spray over medium-high heat until the shrimp begin to turn pink.

3.  Remove crust from the oven and top with shrimp, onions, tomatoes and feta.  Return to the oven and cook for an additional 10 to 15 minutes, or until crust is golden brown.  Transfer to a cutting board and cut into pieces.

The Verdict: Adults loved it.  Child dissected it like it was a high school biology experiment.

My son didn't like the grape tomatoes nor the onions; in other words, he didn't eat any of the vegetables.  Quel surprise.  He was also a little leery of the feta cheese.  He did, however, eat every bit of shrimp and crust given to him. 

As you can see in the picture, if it weren't for the tomatoes, this pizza would be pretty boring to the eye.  This is one place where the grilled vs. oven-cooked differences comes in.  The grilled pizza is has lovely little charred bits on the crust and the shrimp; the oven-baked pizza is largely white.  And because I didn't grill it, I can only guess about the next part and that is the sogginess factor.  Pizza, especially when it's homemade, runs the risk of being soggy.  It's in part because most of us don't have a pizza oven (but Lord, how I wish to have an outdoor brick oven someday!) that heats up to blazing temperatures, but it's also expertly stretching the dough and topping the pizza. 

Shrimp tends to let out a lot of moisture as it cooks, and of course, feta cheese is a high-moisture cheese.  In order not to end up with a soggy middle, drain the shrimp and dab with a paper towel after you cook it.  And squeeze out your feta before crumbling. 

Besides being too soft in the middle, the taste was fantastic.  It smells delicious as it cooks, too.  The oregano is slightly lemony, making it a perfect herb to pair with shrimp.  The feta gives the pizza a nice, salty tang and, when the tomatoes are added in, a great Mediterranean flair. 

Too bad the little critic didn't like it as much as we did.  But I'll keep trying.

Wednesday, July 20, 2011

Beer-Braised Chicken

I have been absolutely dying to share this recipe with everybody.

I found this recipe for Beer-Braised Chicken when I was at the end of my pregnancy, right around the time that I became too exhausted to blog.  I'm pretty sure that it came from Food Network Magazine but I can't remember now.  But I can tell you that the half page I ripped out from where ever is tattered and covered in oil spatter.  And after the birth of my second son, when the majority of what we were eating came from previously frozen foods, I still found the time to make this every couple of weeks. 

Beer-Braised Chicken

1/4 lb slab or thick-cut bacon, cut into 1/2-inch pieces
8 skinless, boneless chicken thighs (about 2 1/2 lbs)
Kosher salt and freshly ground pepper
All purpose flour, for dredging
1 tbsp extra-virgin olive oil
1 12-oz bottle beer (preferably brown ale)
1 cup frozen pearl onions, thawed
1/2 lb small red-skinned new potatoes, halved
2 tbsp whole-grain mustard
2 tbsp packed dark brown sugar
1 tsp thyme (or 4 springs fresh)
3 tbsp chopped fresh parsley

1. Heat a large pot over medium-high heat.  Add the bacon and cook until browned, about 5 minutes.  Remove with a slotted spoon and transfer to a paper-towel-lined plate.

2.  Season the chicken with salt and pepper and dredge in flour, shaking off excess.  Add the olive oil to the drippings in the pot.  Add the chicken in batches and cook over medium-high heat until golden on the bottom, 6 to 7 minutes, then flip to sear on the other side, about 1 minute.

3.  Add the beer, onions, potatoes, mustard, sugar, thyme and 1 cup water to the pot and stir, making sure the chicken is fully submerged.  Simmer until the chicken is cooked through, about 15 minutes.  Discard thyme if using fresh and stir in bacon and parsley.

The Verdict:  This is one of my top five all-time favorite recipes.  Love, love, love it.

The whole family is in agreement that this is a great, flavorful home-cooked meal.  There's the rich and malty taste of the beer paired with the sweetness of the brown sugar and onions, mixed with the grainy flavor of the mustard.  So many deep flavors going on in this dish, all the while not being overly fussy.  And speaking of fussy, the preschooler will eat this dish every time I make it.

I always use turkey bacon in all of my cooking and this recipe is no exception.  It works just fine. 

This dish is great when paired with a nice crusty bread or a crisp salad.

I'm a new mom, so time is of the essence.  While this dish isn't ridiculously time consuming, it's also not a toss together and serve dish either.  Cooking the bacon, as well as dredging the chicken in flour and browning it, takes time.  So if you don't have at least 45 minutes to put into it, wait until a weekend to make it.  But make sure you do--this one is a keeper.

Tuesday, July 19, 2011

Carrot Soup

Well, you aren't going to believe it, but it's another crock pot recipe.

Carrot soup seemed like the perfect thing for Meatless Monday.  And while I generally complain about crock pot recipes, this one from Family Circle didn't worry me.  My tired refrain is always too wet, too mushy but this is soup.  It's supposed to be wet and mushy, right?  No, I had bigger worries.  Mainly that I was gearing up to serve a large bowl of orange liquid to my picky 3-year-old.

He loves raw carrots and sometimes he'll enjoy cooked ones.  And he loves soup.  But carrot soup?  Hmmm.

Carrot Soup

1 medium onion, sliced
2 large cloves garlic, peeled and sliced
1 1/2 lbs carrots, peeled trimmed and cut into 3-inch pieces
1 box (32-oz) vegetable broth
2 tbsp brown sugar
1 1/2 tsp ground ginger
2 tbsp heavy cream
1/4 tsp salt
3 tbsp instant potato granules (for a thicker soup, if desired)

1. Scatter onion and garlic over bottom of slow cooker bowl.  Top with carrots.  Add vegetable broth and two cups of water.

2. Cover slow cooker and cook on HIGH for 6 hours or LOW for 8 hours.

3.  Uncover and stir in brown sugar, ginger and heavy cream, salt and instant potato granules, if using.  With a blender, an immersion blender or food processor, carefully puree until desired consistency is reached.

4. Transfer soup to bowls.  If desired, garnish with cashews and/or fresh cilantro.

The Verdict:  And the critic I feared most took a giant temper tantrum moments before dinner and never ate.  Sigh.

So let's move onto the verdict from the adult diners who ate between moments of familial insanity.  My husband and I both liked the soup, however, the blog will go on as we haven't blessed this the only food we'll eat for the rest of our lives.  In fact, while it was good, it wasn't great.  It lacked something.  More ginger for extra zing?  A little cumin for some kick?  More cream to smooth out the texture?  Not sure.  It was just a little too safe for my liking. 

I am definitely no expert on vegan cooking, but it's my guess that this dish could go vegan quite easily.  In lieu of the cream, a substitution of coconut milk or silken tofu could be added.  And shazam, no animal products.

This makes a pretty large portion of soup.  You can read this to mean that we'll be eating it again for dinner this week and the little guy will have to give his two cents eventually.  I'm thinking about selling it as bunny soup or something equally silly.  He's pretty sharp though; the fatuous food monikers don't really work with him.  We'll just have to wait and see. 

Tuesday, July 12, 2011

Tuscan Summer Stew

If any of you are regular readers of my blog, you know about my relationship with my slow cooker.  So many people sing the praises of their crock pot: they can't live without it, it's so convenient, food is so juicy from it, etc. 

I try.  I try so hard to be a disciple of crock pottery, but again and again, I fail to feel the love.  What seems like 9 times out of 10 the recipe turns out too wet, or too stringy, or too gloppy, or just...yucky.  The apogee of irritation was the time I had not one but two slow cookers going, making a big batch of coq au vin.  It was delicious, but not because of the slow cooker.  It was for the 90,000,000 steps I had to take afterward to turn chicken soup into classic French stew. 

So when I saw this recipe for Tuscan Summer Stew with its happy little green beans and succulent chunks of sausage, my heart fell when I learned it was a crock pot recipe.  Should I even bother?  Will this turn into another gloppy pot o' water?  Could I try to use the basic recipe idea and make it in a Dutch oven?  Damn you, Family Circle* magazine, August 2011 issue!Oh, the indecision was killing me.  (OK, it really wasn't.) 

(* And yes, I now have a subscription to Family Circle.  A second child has seriously cramped my cool factor.)

In the end, I decided to dig out my adversary and see what happened.

Tuscan Summer Stew

Stew
1 package (20 oz) sweet Italian turkey sausage
1/2 lb green beans, trimmed and cut into 2" pieces
2 lbs tomatoes, cored, seeded and cut into 1" chunks
1  tsp chopped fresh rosemary
1/4 cup white balsamic vinegar
2 ears corn, kernels cut from cob (2 cups)
1 tbsp instant polenta
   Fresh basil to garnish (optional)

Polenta
3/4 tsp salt
1 cup polenta
2 tbsp grated Parmesan cheese

1.  For the stew: Heat a large nonstick skillet over medium-high heat.  Add sausages and brown on all sides, 4 minutes.  Transfer to a slow cooker.

2.  Top sausages with green beans, tomatoes, and chopped rosemary.  Whisk balsamic together with 3/4 cup water.  Pour into slow cooker.  Cover and cook on HIGH for 6 hours or LOW for 8 hours.

3.  For the polenta:  Just before slow cooker is finished, bring 2 cups water and the salt to a boil.  While whisking, add 1 cup instant polenta in a steady stream.  Continue to cook, whisking, for 5 minutes.  Remove from heat and stir in Parmesan cheese.

4.  Uncover slow cooker.  Carefully remove sausage to cutting board.  Stir corn kernels and 1 tablespoon instant polenta into slow cooker.  Cover.  Slice sausages and stir into stew.  Serve stew over polenta; garnish with fresh basil, if desired.

The Verdict:  Hold onto your hats, folks, because you aren't going to believe what I have to say. 

I liked this recipe.  I liked it a lot.

When the cook time was nearly over, I dutifully cooked the polenta as well as added the tablespoon into the crock pot.  At that moment, I was rather skeptical because, per the usual, the contents were very soupy.  But the added corn and polenta seemed to thicken it just enough, and in this instance, the broth was a wonderful accompaniment to the cooked polenta. 

I am a big fan of balsamic vinegar.  I love the syrupy bite that it brings to foods.  I was clueless as to what white balsamic vinegar is, though, and didn't really care to investigate the matter beyond a quick Google search.  White balsamic vinegar, apparently, is milder and (not surprising) is a lighter color than its cousin, therefore not staining foods.  I'm going to surmise that it means the difference is slight.  If you, like me, have the holy cow gigantic jug of balsamic vinegar from Trader Joes, don't feel the need to run out and buy white balsamic vinegar just for this recipe. 

If I were to make this again, I would definitely reduce the cook times.  They seemed a bit long and, after actually making it, really was.  Your fresh green beans lose their crispness and the sausages that you "carefully remove" don't really need a trip to the cutting board as they fall apart with the nudge of a spoon.  I don't think it ruined the recipe, but it would have been more pleasant if it were a little less soft. 

Speaking of the sausage, this recipe could easily be made vegetarian by using a soy sausage or even leaving the sausage out all together and adding a little fennel seed and sage. 

But before I can stamp this as a success, I do have to give voice to the other members of my family who ate this as well.  My three-year-old has changed very little in the past three months of my absence.  While he ate every speck of sausage on his plate and even ate a wandering tomato bite, the polenta was met with disdain.  His first good natured bite was quickly spit out.  The second, which I nearly lost my breath with arguments and begging, also joined the first bite as he let it slide off his tongue and back into his plate.  My poor husband probably wanted to do the same with his polenta, but of course, he ate an hour after us.  Polenta, my friends, is not a good sit-and-wait food.  It becomes a gelatinous mass that does nothing for the food it is accompanying it.  Perhaps my husband just really didn't like the dish, but I feel like the cold polenta really biased his review.  He told me he'd give it three out of five stars.   

Kinaymans, yet was shot down by the male contingent of eaters.  Bummer.

The Kitchen Has Re-Opened!

My apologies for leaving those of you who follow my blog hungry.  But for those of you who know me personally, the reason for my absence is pretty obvious: a little over three months ago, we welcomed a beautiful baby boy to our family. 

It's been a hard transition from one to two children.  Despite trying to ready myself for it, there was no way I could have appreciated the juggling act I'd have to master.  And that's just the juggling of the two kids; I'm not even talking about throwing the rest of life into the mix.  One aspect of life is obviously feeding my family, but before you think we were all starving for all these months, please know that we ate well.  This blog was a life saver as I used it to revisit the recipes that we all loved, that could be easily doubled and froze well.  And so before my son was born, I spent many hours in the kitchen preparing chilis, lasagnas, soups and stews so that I could focus my time on my children. 

Lately I've been making two batch meals a week to add to our dwindling supply.  That way, I can shake up the menu a bit, as well as leave space to try new (never frozen?) recipes.  It's also summer time, and at least once a week we like to eat a meal of farmer's market vegetables along with something on the grill, like salmon.  And now that I'm slowly learning new routines--and if you have kids, you know that this will include things like "having a shower at least every other day"--I'm making my way back into the kitchen.  And the computer. 

So it's my hope that everyone can have Dinner at the Kinaymans on a more regular basis.  I've missed blogging for everyone and I hope you've missed the recipes.

Afiyet olsun!

Saturday, April 2, 2011

Pasta Fagioli

Now that my preschooler is into soup, I'm all about making it as much as I can.  There's nothing cheaper, easier, or more delicious.  This recipe for pasta fagioli from Family Circle was the latest soup that we tried.

Pasta Fagioli

2 tbsp olive oil
1 onion, diced
1 can (14.5 oz) diced tomatoes with basil, garlic and oregano
2 cans (14.5 oz) reduced sodium chicken broth
8 oz (about 2 cups) small pasta shells
1 tsp Italian seasoning
1 bunch fresh kale, tough stems discarded, cut into 1-inch pieces and washed*
2 cans small white beans, drained and rinsed
1 tbsp tomato paste
1/2 tsp salt
1/4 tsp pepper
Grated Parmesan, for serving

(* I wasn't impressed with the selection of kale and used baby spinach instead)

1.  Heat oil in a large pot over medium heat.  Add onion and cook 5 minutes.  Add garlic; cook 1 minute.

2.  Stir in tomatoes, broth and 3 cups of water.  Bring to a simmer over high heat.  Add pasta and Italian seasoning.  Cook, stirring, 5 minutes.

3.  Stir in kale; cook 5 minutes more.  (If using spinach, cook for approximately 2 minutes.)  Reduce heat to medium and stir in beans, tomato paste, salt and pepper.  Heat through.

4.  Ladle into bowls; garnish with Parmesan.

The Verdict:  Quick, easy, delicious.

This is another soup that's great for the toddler to preschool set as you can ladle out more beans and pasta than broth, making it easier for them to eat.  Of course, if your kid is my kid, you have to spend a few minutes picking out bits of floating green.  While that was annoying, he did proclaim this recipe to be "delicious" (or "deeyishis" in Amir speak).

The combination of tomatoes/beans/pasta is always a hit in our house.  It's satisfying and keeps well for leftovers; just add a little more water and broth to the next day's pot. 

While this isn't the best recipe ever, it is good.  And fast.  And vegetarian.  And, most of all, the kiddo likes it. Which means that I might just make it again. 

Friday, April 1, 2011

Crock Pot Coq au Vin

Before the birth of my newest child, I spent a great deal of time cooking and freezing food.  If you follow this blog you already know this.  I have a good recipe for coq au vin, as well as a new one from a Good Housekeeping cookbook that's cooked in a crock pot.  It was a giant cooking conundrum.  I know and love my recipe for coq au vin, but thought that since it is slow-cooked in the oven, wouldn't a crock pot work just as well or better?  My gut told me not to fool with the French and use a Dutch oven.  But laziness overruled and I decided to go with the crock pot recipe instead.

Crock Pot Coq au Vin

3 slices bacon, cut crosswise into 3/4-inch pieces
1 package (10-oz) mushrooms, cut in half
2 cups frozen pearl onions
1 cut-up chicken (4 lbs) skin removed from all pieces except wings
1/2 tsp salt
1/4 tsp ground black pepper
1 medium onion, chopped
1 large carrot, chopped
4 cloves garlic, chopped
1 cup dry red wine
2 tbsp tomato paste
1 bay leaf
3/4 cup chicken broth

1.  In a 12-inch nonstick skillet, cook bacon over medium heat until browned.  With slotted spoon, transfer bacon to paper towels to drain; set aside.

2.  Meanwhile, in a 5- to 6-quart slow cooker, combine mushrooms and frozen pearl onions; set aside.

3.  Sprinkle chicken with salt and pepper.  In skillet with bacon fat, cook chicken (in 2 batches, if necessary) over medium-high heat until browned, 10 minutes.  Place chicken over vegetables in slow cooker.

4.  Discard drippings from skillet.  Reduce heat to medium; add onion and carrot, and cook 2 minutes or until onion softens, stirring frequently.  Stir in garlic and cook 1 minute.  Add wine, tomato paste, and bay leaf; heat to boiling, stirring to dissolve tomato paste.  Pour wine mixture and broth over low setting 8 hours or on high setting 4 hours.

5.  To serve, discard bay leaf.  With large spoon, transfer chicken and sauce to deep platter; sprinkle with bacon.

The Verdict:  Damn it!  I hate crock pots!

The funniest part of this story is that I made a double batch.  And, of course, all that chicken didn't fit in my crock pot so I borrowed a second one from my friend across the hall.  So I've got dueling crock pots going in my kitchen, taking up half my counter space.  Now, the reason I was so hesitant to use the crock pot in the first place was because it turns to a giant vat of liquid.  Coq au vin is not supposed to be a broth-based soup.  So I prepared myself: I did research and learned that to reduce liquid you should put your crock pot on high for the last hour and cook with the lid off. 

Did it work?  Of course not!

This means that I'm standing in front of my stove, covered in sweat, while ladling cup after cup of liquid into roux to form a sauce.  Which was so convenient. 

After making the sauce, the finished product was delicious.  Lots of flavors with nice, moist chicken.  But unless you're willing to create the sauce "by hand," I wouldn't try this recipe.  Or use it and cook it in the oven instead.  While the crock pot allows you to leave the house, it also doesn't make real coq au vin, which kind of defeats the purpose.

We have a giant bag of this left in the freezer and I'm looking forward to digging into it.  But I'll certainly think about my loathing for crock pots the entire time I eat it.  Harumph.

Tuesday, March 29, 2011

Potato Pancakes

Phew.  That was kind of a long hiatus from recipe sharing!

All is well here in our kitchen.  In fact, my disappearance was due to our son, Evren, joining the world recently.  He's wonderful, and funny enough, loves to eat and can't get enough.  That sounds just about right for the kiddo of a foodie, doesn't it?

So when last I wrote, I was telling you all about the giant batch of freezer meals I was preparing.  When I was in labor, my aunt and uncle came to stay with my older son and my uncle asked if I was preparing to feed the Georgia militia.  Seriously, I have no intention of cooking for a while.  Anyway, with all that shopping, there were lots of leftovers, so I had a good time coming up with a week's worth of recipes using only those leftover ingredients.  So with the many leftover potatoes, that meant potato pancakes.  This recipe is from the 1978 Joy of Cooking.

Potato Pancakes

2 cups grated potatoes
3 eggs
1 to 3 tsp grated onion, squeezed
1 1/2 tbsp all-purpose flour
1 1/4 tsp salt
1/4 tsp black pepper
1/4 inch or more oil

1.  Pare and grate potatoes.  Squeeze out as much water as possible.  Place in a bowl.  Beat eggs and stir them into the potatoes. 

2.  In a small bowl, sift together flour and salt.  Add the flour to the potato mixture along with the grated onion.  Heat oil in a large, heavy skillet.

3.  Place spoonfuls of the potato mixture in the skillet, forming them into patties 1/4 inch thick and 3 inches in diameter.  Brown, then turn and brown the second side until crisp.  Drain excess grease on a paper towel before serving.  These are usually served hot with applesauce and sour cream. 

The Verdict:  Fairly easy to make and oh, so yummy.

I really love potato pancakes because they're like hash browns, but much more filling.  And they're so much more complex than a regular pancake. 

Speaking of pancakes, they do have one thing in common with their bready, flat cousins: the first batch is generally not so great.  You need to play around to get the right temperature oil (hot) and the right amount of cooking time (somewhere between pale and soggy with oil and burned). 

My son pretended to think they were delicious, when in fact he liked the applesauce and the sour cream.  I don't think he even touched the potato pancake itself.

Would I make them again?  You betcha! 

Friday, March 18, 2011

Zippy Bean Minestrone

I just crowed over this recipe. 

It was really good, but more than that, I got the most gigantic kick out of the fact that it was made entirely of leftovers.  If you read my blog, you'll know that I just finished an epic freezer cooking session.  I had leftover beans, hamburger, and pasta sauce from lasagna.  I had leftover frozen mixed vegetables from some other recipe and just about everyone has some leftover pasta in their pantries, right?  So when I saw this recipe for Zippy Bean Minestrone in The Bean Cookbook, a compilation of recipes from the Northarvest Bean Growers Association, I was stoked.  I had everything I needed right in my fridge and pantry!  No shopping necessary.  The original recipe doesn't call for the hamburger but calls for a can of pork and beans.  Feel free to use their recipe or mine. 

Zippy Bean Minestrone

1/2 lb hamburger
2 tsp olive oil
1 1/2 cups pinto beans
1 package (16-oz) frozen mixed vegetables
1 jar (15 1/2 oz) spaghetti sauce
1 cup water
1/2 cup elbow macaroni (or other smaller pasta)
1 can (10 1/2 oz) beef broth

1.  In a Dutch oven, heat olive oil over medium-high heat.  Cook hamburger until cooked through and no longer pink.  Meanwhile, cook vegetables in a microwave safe dish with two teaspoons of water for 6 to 8 minutes, until thawed.

2.  Combine all ingredients, including the thawed vegetables, with the cooked hamburger.  Bring to a boil.  Reduce heat and simmer, covered, for 20-25 minutes.  Add water if needed.

The Verdict:  Yeah, seriously, that's the soup.  And if you don't add the hamburger, it's more complicated to brush your teeth than it is to put this recipe together.  (Oh yeah, and it tastes good to boot.)

My husband and I enjoyed it.  I was nervous at first that you don't add any spices, but you don't need to if you're using jarred sauce as all the flavor you need is right there.  Once I tasted it and liked it, I was over the moon.  I'd created this really great soup with this-and-that in the fridge that might have otherwise been thrown out.  That often happens, especially with the pasta sauce.  I buy the giant jar to make two lasagnas but never use the whole thing because I forget about it.  Problem solved.

I was really nervous about my son liking it.  I prayed that the beans and meat, two of his favorites, would get us through the meal.  But miraculously, he loved it!  I picked out any obvious giant green beans floating in it to avoid the "I don't like green stuff" fight we have 90 times a week and ladled his heavy with the solids, rather than the broth.  I also greased the wheels with a nice, crusty bread with plenty of butter; he's a bread maniac.  His response to the meal was, "Tasty!"  (I'd suggest a crusty bread regardless if you have a picky eater in your house or not.  It's the perfect accompaniment to this soup.)

Would I make this again?  Yes, especially with leftovers.  That was more fun than this nerd can handle.

Cowboy Pie

The past two weeks have been crazy.  Just in general as well as in the kitchen.  I decided to do huge batches of dishes to freeze for after our baby's arrival and spent many, many hours slaving over a hot stove, literally barefoot and pregnant.  While I didn't spend all that much for what should amount to over a month's worth of dinners, I did realize halfway through my cooking that I didn't spend--and therefore buy--anything for the coming week.  But rather than panic and run back to the supermarket (and throw my husband into convulsions as he already thinks I spend too much on groceries, which is not true, and a subject for another day), I decided to go with what I had.  And that was scraps of leftovers from my giant batch cooking.

A couple of the recipes called for ground hamburger, so I bought the "holy crap, Batman" sized pack, leaving a good two pounds of meat free.  I also made a chili I adore with dried beans, which I never use.  Wow, that's a nice way to save money and get lots of meals.  I had oodles of leftover pinto beans.  So night one of "creative kitchen cooking": Cowboy Pie.

Cowboy Pie

1 lb ground beef
2 cups pinto beans
1/2 cup medium onion
1 tbsp olive oil
1/2 cup canned or frozen corn
1 cup canned crushed tomatoes in puree
1/2 tsp chili powder
1/2 tsp cumin
1/2 cup grated cheddar
1 package instant corn bread mix, prepared according to instructions

1.  Preheat oven to 350 degrees F.  Heat olive oil over medium high heat.  Add onion and cook until tender and translucent.
2.  Add hamburger and cook until no longer pink, then add beans, corn, tomatoes, chili powder, and cumin.
3.  In a bowl, prepare cornbread mix as directed on package.  Set aside.
4.  Grease a 9-inch pie plate.
5.  Spoon bean and meat mixture into the pie plate and top with "blobs" of corn bread.  Carefully spread to cover.  Top with cheddar cheese.  Bake 30-35 minutes or until corn bread is golden brown. 

The Verdict:  This is a fun meal.  If you like chili and corn bread, you'll like this.

You can obviously use canned beans and buy a pound of hamburger to make this, but it was pretty economical and easy to have all the ingredients ready in the fridge.  As I'd said, we used the beans and meat for chili, shepard's pie and meatloaves, but there are about 8 zillion other recipes you could find that you could batch cook with hamburger and beans.

You can probably tell from the picture, but I forgot to sprinkle the cheese on the pie before it went in the oven.  Boo!  Is there anything better than hot, gooey cheese?  Not really. 

Probably even more delicious is if you make your own corn bread.  In these final weeks (and now days) of pregnancy, I don't have the time or energy for that kind of cooking.  A good ol' package of Betty Crocker or Jiffy will do just fine if you don't want to get too fancy in the kitchen. 

This meal works well for my son.  He loves meat and beans and will often eat corn with no complaints.  He also loves cornbread, but was suspicious of it on top of his food.  We make it quite often in our bread machine and I guess that's his favorite.

Not in a rush, but would definitely make this again.

Friday, March 11, 2011

Crock Pot Lemon Pudding Cake

On the same night that I made the Crock Pot Chicken Pasta, I also made this dessert for lemon pudding cake.  It was kind of funny because I had my large crock pot on one part of the countertop and my smaller one cooking this recipe.  This comes from Fix-It and Forget-It, Our Best Slow Cooker Recipes 2010 but I've changed the recipe a bit.  While they call for an actual lemon, I use lemon concentrate.  I've made this dessert once before, and then, too, it was a spur of the moment decision to make.  I generally don't just happen to have lemons in my house. 

Crock Pot Lemon Pudding Cake

3 eggs, separated
1/4 cup lemon concentrate
3 tbsp butter, melted
1 1/2 cups milk
3/4 cup sugar
1/4 cup all-purpose flour
1/8 tsp salt

1.  In a bowl, beat egg whites until stiff peaks form.  Set aside.

2.  Beat egg yolks in a bowl.  Blend in lemon, butter, and milk.

3.  In a seperate bowl, combine sugar, flour, and salt.  Add to lemon mixture, beating until smooth.

4.  Fold into beaten egg whites.

5.  Spoon into slow cooker.

6.  Cover and cook on high 2 to 3 hours.

7.  Serve with a spoon from slow cooker.

The Verdict:  It's really yummy, it's totally fun to serve, but not to mince words--it's a pain in the ass to make.

I'm not sure how I'd forgotten that from the first time I'd made it.  In my last blog post, I was writing about how much I've been relying on the crock pot for its ease, yet here I am dirtying three bowls and folding stuff into egg whites that I whipped with a hand mixer.  Hello, does that sound easy?  Not that it's rocket science, it's just not conduicive to easy pregnancy cooking.

We all really like the taste of this, though.  It's a bit cakey and a bit moussey at the same time, which has a nice mouth feel.  And while I'm always startled by cream and lemon together (isn't that an instant bellyache?) it's always a satisfying taste.  The creaminess, which in this instance is the eggs and milk, cuts down the acidity of the lemon, creating a sunny and mellow taste. 

I do suggest that you let it cool down before eating it.  The most obvious reason is not to burn your mouth--duh--but it's one of those foods that just doesn't feel good in your belly too warm. 

If you're looking for a quick dessert, this isn't it.  But if you want to impress everyone with the novelty of a crock pot making dessert, this is worth making. 

Crock Pot Chicken Pasta

Wow.  Now that I'm nearing the end of this pregnancy, I'm really relying on the crock pot.  But don't get it twisted; I'm not singing its praises.  I'm still not sure how much I love his device.  Still, it makes an easy, hot meal that I don't have to mess around too much with. 

So that's why I decided to give this chicken pasta recipe a try.  It's again from Fix-It and Forget-It, Our Best Slow Cooker Recipes 2010 which claimed that this was a "kid-friendly" meal.  That didn't hurt when choosing it, though of course my son's current pickiness isn't easily quelled by a label. 

Chicken Pasta

1 1/2 lbs boneless chicken breasts, cut into 1-inch cubes
1 large zucchini, diced
1-oz envelope chicken gravy mix
2 tbsp water
2 tbsp evaporated milk or whipping cream
1 large tomato, chopped
4 cups cooked macaroni
8 oz smoked Gouda cheese, shredded

1.  Place chicken in slow cooker.

2.  Add zucchini, gravy mix, and water.  Stir.

3.  Cover and cook on high 1 hour and then on low 4 hours.

4.  Add milk and tomato.  Cover and cook on low 20 minutes more.

5.  Stir in pasta.  Top with cheese.  Serve immediately.

The Verdict:  Reminds me of tuna noodle casserole.  And before you clap your hands in glee that I'm telling you it's a comfort food, let me tell you about tuna noodle casserole.

My mom used to make it about twice a year.  And quite a few times I talked them into letting me watch The Brady Bunch reruns on tuna noodle night.  While the Brady's doled out advice like, "Mom always said, don't play ball in the house!" I would surreptitiously scrape my plate behind the couch because my dog wouldn't eat the stuff.

So when I took my first bite or two and thought of tuna noodle casserole, I knew I'd hate it.  And a few bites more confirmed it.  My son hated it, too.  My husband thought it was fine, but this is the guy who, when we first started dating, told me over the phone he was eating his dinner of cereal and milk powder.  He's come a long way, baby.

I'm not saying you wouldn't like it.  I'll bet it really does have a homey, comfort food appeal to some people.  For me, something about the grittiness of the chicken and the gravy, the creaminess of the the cream and the hot macaroni just doesn't do it for me.  All together, it makes me...want to scrape it behind my couch.  But since I'm the one who'd have to clean it up, I probably won't.  I just won't make it again.

Sunday, March 6, 2011

Hearty Alphabet Soup

Since our son is finally getting into eating soup, I wanted to find another recipe for a good and easy one.  This seemed like it might do the trick.  Not only does it get cooked in the crockpot, eliminating slaving over the stove, but it's very few ingredients.  Two of them are chunks of beef and alphabet pasta.  I figured that might be a hit.  This is another recipe from Fix-It and Forget-It, Our Best Slow Cooker Recipes 2010.

Hearty Alphabet Soup

1/2 lb beef stew meat or round steak, cubed
14 1/2-oz can stewed tomatoes
8-oz can tomato sauce
1 cup water
1.25-oz envelope dry onion soup mix
10-oz package frozen vegetables, partially thawed
1/2 cup uncooked alphabet noodles

1.  Combine meat, tomatoes, tomato sauce, water, and soup mix in slow cooked.

2.  Cover and cook on high 1 hour and then on low 4 to 6 hours.  Turn heat to high.

3.  Stir in vegetables and noodles.  Add more water if mixture is too dry and thick.

4.  Cover and cook on high 30 minutes or until vegetables are tender.

The Verdict:  I wasn't mad about it, but my husband and son liked it a lot.

Honestly, I should have added more water and less pasta.  But I was trying to make it more stew-like.  Don't try that trick; instead, it feels grainy in your mouth.  Yuck.  Other than my own faux pas, the soup was fine.  I don't think that it was rockets and fireworks, but I suppose not every meal needs to be.  Especially when it's alphabet soup.  I can't ever recall anyone going on and on enthusiastically about a bowl of alphabet soup they ate the other day, do you?

My son thought it was pretty great.  And suprisingly, the little guy who hates green stuff was so absorbed in eating meat and spotting letters, he didn't comment at all about vegetables.  I did pick out large and obvious green beans for his serving; otherwise, he happily ate bites with corn, carrots and peas. 

I served it with whole wheat toast.  A bread on the side is a must with this dish.

Saturday, March 5, 2011

Pan-Seared Steak

My husband has requested that I start making more meat-and-potatoes kind of meals for our carnivore son.  So when I saw the picture that accompanied a recipe I'd long ago ripped out of Everyday Food, I decided that one night this week that would be dinner.

So I bought a nice sirloin steak and read the recipe.  Who knew it could also be called "Pan-Seared Steak for Dummies"?  The very thought of that makes me crack up, as the magazine is a Martha Stewart publication and I kind of think she'd as soon die than have her name attached to anything dumb.  But really, this steak is a snap.  No marinades, no spices.  Just salt, pepper, and some vegetable oil.   

Pan-Seared Steak

2 1-inch-thick sirloin steaks or 4 1-inch-thick strip steaks
1 tbsp vegetable oil
1 tsp salt
1/2 tsp pepper

1.  Dry steaks with paper towels.  Rub the meat all over with the oil, salt and pepper. 

2.  Heat a cast-iron skillet or other heavy skillet over medium-high heat until a drop of water sizzles when it hits the pan.

3.  Cook steaks in hot skillet 5 minutes.  Flip; cook until medium rare, 5 minutes more.  Cook strip steak in two batches.  
The Verdict:  My husband called this one.  Before it got to the table, my son yelled out "oh yummy!"  Then gobbled up an adult-sized portion of meat.  He also called it "delicious" and at another point said, "yum num num num num." 

Oh yeah, and we liked it, too.

You obviously need to buy a decent steak for this recipe to work.  The heat and the quality of the meat is what makes it good.  I also served this with a mushroom sauce, but really, the sauce was completely unnecessary.  I just love mushrooms with red meat, especially red meat on the rare side.  And, of course, mashed potatoes are a must.  I absolutely adore the instant garlic mashed potatoes from the Whole Foods 365 Everyday Value line.  Cook and mash potatoes?  Pfffft!  What is it, Thanksgiving?

While I made the sauce, I kept the steak tented in tinfoil on an edged cookie sheet in a 250 degree oven.  This also allows the steak to gently cook a bit further. 

So see what I mean?  Steak for dummies.  But if you serve this, only you'll know that because everyone else will think you're brilliant.

Thursday, March 3, 2011

Cheese Ravioli with Roasted Squash

It was kind of random, but on Saturday afternoon my husband said "want to go to a cheese shop that my friend told me about?"  Um, OK.  Even funnier was that he didn't know where it was or what it was called, but assured me we'd find it (while driving) if I Googled "Boston cheese shop."  At first a place in Southie came up...Southie?  Boston's South End is really coming up, but it's still not "our" neighborhood.  Then it dawns on me: Formaggio Kitchen in Cambridge?  Never been there, but Huron Avenue is a lot more our pace.

So we took a very round about detour to get back to this side of Cambridge.  And it was worth it.  It brought us back to our trip to Paris two years ago.  A fromagerie full of the penetrating smell of fancy cheeses.  (Not to mention chock full of serious and a tad bit snotty shoppers.) 

Oddly, this story is not about cheese, but squash.  In this shop, among all that cheese, were a variety of other groceries, including produce.  And to my surprise, I found local and fresh acorn squash!  I guess it's possible that in some kind of cold cellar a winter squash could survive this long in storage.  We happily bought some cheese, some fig cake and my coveted produce.  After that, we stopped by our local Whole Foods for dinner and a few groceries, where I found this recipe for  Cheese Ravioli with Roasted Squash.

Squash Ravioli

1 1/2 - 2 cups (1 small) winter squash (like butternut or acorn) cut into 1-inch cubes
1 yellow onion, diced
8-10 fresh sage leaves
2 tbsp olive oil
Sea salt and freshly ground pepper
1 package cheese ravioli
2 tbsp unsalted butter
1 cup vegetable broth
1/4 - 3/4 cup shredded Parmesan cheese

1.  Preheat the oven to 400 degrees F.  Toss squash, onion and 2 chopped sage leaves in oil, salt and pepper.  Transfer to a roasting pan and roast 20 to 25 minutes, turning once or twice, until tender.  Towards the end of the squash cooking time, cook ravioli according to package directions. 

2.  Melt butter in a large skillet over medium heat.  Fry remaining sage leaves in one layer for 1 minute.  Flip and fry until crisp, about 1 minute more.  Remove from skillet to drain.  Reduce heat to low, add broth and bring to a simmer.  Add drained pasta and squash-onion mixture.  Adjust seasoning, garnish with fried sage and sprinkle with cheese.

The Verdict:  Very good.  The ricotta cheese of the ravioli and the sage-infused squash are wonderfully complimentary.

The original recipe was called "Butternut Squash Ravioli" and I can't think of a more misleading name.  It is, I suppose, but the first image that forms in everyone's mind is ravioli stuffed with squash.  Someday, when I have time to mess around with my pasta maker again, I'd love to make actual squash ravioli.  Instead, this recipe is a little more my speed.  It also helps for when you tell people, "I'm making squash ravioli for dinner" not to hear their let down response after explaining that it's squash with ravioli.  Nothing deflates your kitchen bravado than someone unenthusiastically saying, "Oh." 

But this recipe is great.  Roasting squash is delicious on it's own since it brings out an almost nutty taste in it.  Add a good quality olive oil, some nearly caramelized onions and fragrant sage--well, you've got yourself something mouth-watering.  Add to that mild cheese ravioli, butter and fried sage?  Yes, it's as good as you imagined.  It's a pretty dish as well (sorry for no picture again) with the off-white pasta, golden squash, and the dark green sage. 

Wednesday, March 2, 2011

Shrimp Scampi with Garlic Toasts

Oh, I'm trying very hard to keep everyone in recipes, but cooking, never mind blogging, is getting harder and harder as this pregnancy careens towards the little one's arrival.  But if you like shrimp, this recipe is for you.  It comes from the Everyday with Rachael Ray magazine and it couldn't be easier.  Or more delicious.

Shrimp Scampi with Garlic Toasts

3 tbsp extra-virgin olive oil
3 tbsp unsalted butter
5 cloves garlic, chopped
Kosher salt
8 1/2-inch-thick slices crusty bread
1 1/4 lbs large shrimp, peeled and deveined, tails intact
3/4 cup dry white wine or low-sodium chicken broth
Grated zest and juice of 1/2 lemon, plus lemon wedges for serving
1/3 cup chopped fresh parsley
1/3 cup chopped fresh chives

1.  Preheat the broiler.  Heat the olive oil and 2 tbsp butter in a large ovenproof skillet over medium heat.  Add the garlic and 2/3 tsp salt and cook 1 to 2 minutes; remove from heat.  Brush both sides of bread with some of the garlic mixture and arrange on a baking sheet.  Broil the bread until toasted, about 1 minute per side.   Divide the bread among 4 bowls.

2.  Place the skillet with the remaining garlic mixture over high heat.  Add the shrimp and toss to coat, then stir in the wine and lemon zest and juice.  Transfer to the broiler and cook until the shrimp are pink, about 3 minutes.  Transfer the shrimp with a slotted spoon to the bowls.

3.  Return the skillet to high heat and boil the cooking liquid until slightly thickened, 1 to 2 minutes.  Stir in the parsley and chives.  Whisk in the remaining 1 tbsp butter and simmer 1 to 2 minutes more; pour over shrimp.  Serve with lemon wedges.

The Verdict:  Garlic and lemon shrimp over crispy bread?  Do you need me to say more?  It's amazing.  I want it every day.

If you regularly read my blog, you know about my son's current aversion to green stuff.  I avoided this by putting the thickened sauce without the herbs and butter, over his shrimp.  Too bad that didn't work.  The boy who generally gobbles down seafood like it's cake refused it.  Ate some bread, but wouldn't touch the shrimp.  It might be worth it to add that my kiddo is also on the longest nap strike ever.  I'd chalk it up to him just not needing it anymore, but a five minute visit to my house at 5 p.m. would convince you otherwise.  So he's not my best food critic at the moment.

My husband and I, on the other hand, fell hopelessly in love with this dish. 

One thing to keep in mind if you make it: you've got to work fast.  Read the recipe a bunch of times before you make it.  It's not hard, but it's busy.  If you start your shrimp while making the garlic toast, you run the risk of burning it.  The skillet goes from stovetop to broiler to stovetop, tempting you to forget where it's been and burning the heck out of your hands.  If you're chopping herbs while reducing your sauce, you run the risk of over-reducing it.  So be methodical and alert.

The magazine suggests shrimp that's been peeled and deveined but not had their tails removed.  My husband hates the sight of shrimp tails and I fear my son would eat them, so I always remove the tails regardless of what a recipe calls for.  I generally buy my seafood at Whole Foods, but was in a rush and picked up a bag of frozen shrimp from Target, their own brand.  Just as an FYI, they sell shrimp that's been cleaned and shelled.  Yay!  What a treat for this mommy!  And they weren't pumped up with water so that when you cook them they shrink to minuscule proportions.  They remained plump.  One point for Target.

I would definitely serve this with a salad.  Unless it's just pregnancy hunger, shrimp and toast wasn't quite enough for dinner.  You might want to have a little something to back it up.  Otherwise, it's a terrific meal.

Monday, February 28, 2011

Beef & Cheese Cobbler

While out shopping at one of my favorite discount department stores recently, I came across a really fun cookbook for a song called 1 Ground Beef, 100 Meals.  I couldn't pass it up.  I mean, hamburger is the cheapest thing you can buy in the market and the possibilities are endless. 

The first recipe I wanted to make from this book was Beef & Cheese Cobbler.  The recipe as it appears in the book has a nice cobbler topping; pretty much a homemade cheese biscuit.  But at 35 weeks pregnant, I don't want to mess around with cookie cutters.  I'll give you my shortcut version of this dish.

Beef & Cheese Cobbler

2 tbsp olive oil
1 lb ground beef
2 tbsp all-purpose flour
1 lb onions, cut into wedges
1/4 cup ketchup
1 tsp dried thyme
1 bay leaf
1 cup beef stock
milk, for glazing
salt and pepper
3/4 cup grated cheddar cheese
1 can instant biscuits (like Grands or Simply Buttermilk Biscuits)

1.  Preheat oven to 350 degrees F.  Heat oil over medium heat and add ground beef.  Cook, stirring frequently and breaking the beef up with a wooden spoon, for 8010 minutes, until evenly browned.

2.  Remove skillet from heat and spoon ground beef into a casserole dish, then stir in the flour.  Add the onions, ketchup, thyme and bay leaf and season to taste with salt and pepper.  Pour in the stock and stir well, then cover and bake in the preheated oven for 1 hour.

3.  After the hour, remove the casserole from the oven.  Sprinkle with half the cheese, then place overlapping biscuits on top of ground beef mixture.  Sprinkle with the remaining cheese and put back into the oven for an additional 30 minutes, or until biscuits are golden brown.

The Verdict:  We all loved this, including Mr. Picky, the toddler in residence. 

It wasn't the healthiest choice, but it sure was a nice comfort food.  The ingredients in the ground beef are simple but work well together to create a pleasant taste.  The hamburger stays juicy without being gloppy like a sloppy joe.  The biscuits are the perfect accompaniment. 

Since onions are a current part of my son's "no-eat" list, I was initially worried.  I didn't want to leave them out; onions are a fragrant and integral part of cooking.  But a-ha!  Because they were chunked, I could easily pick them out of his portion.  They still flavored his food, but he never knew they'd been there.  (And by the way, we started the meal with carrot sticks.  That way, he got a serving of vegetables before we started eating the family meal.)

Maybe someday when my energy levels are waxing toward normal I'll make this the way it's described in the cookbook.  For now, this is easy enough to prepare with little hands-on time and everyone liked it as is.  I'd make it again.

Saturday, February 26, 2011

Apricot Stuffing and Chicken

Time to dig out the old crockpot again.  I've mentioned in a couple of previous posts that I'm looking for easier recipes now that I'm getting ridiculously pregnant and don't want to spend as much time in the kitchen and generally the slow cooker heeds the call.  And where I'm not a giant fan of "cream of dinner", I was kind of excited to try this recipe out as it calls for four...count 'em...four ingredients, none of them being a cream of something soup.  I found this dish from Fix-It and Forget-It, Our Best Slow Cooker Recipes 2010.

Apricot Stuffing and Chicken

6-oz pkg. cornbread stuffing mix
1/2 cup butter, divided
4 boneless, skinless chicken breast halves
6- to 8-oz jar apricot preserves

1.  In a mixing bowl, make stuffing using 4 tbsp butter and amount of water called for in package instructions.

2.  Cut chicken into 1-inch pieces.  Place in bottom of slow cooker.  Spoon stuffing over top.

3.  In microwave or on stovetop, melt remaining 4 tbsp butter with preserves.  Pour over stuffing.

4.  Cover and cook on high 3 hours or cook on high 1 hour and then on low 2 hours or until chicken is tender.

The Verdict:  I think my cat could make this recipe it's so easy, but it's so good you'd never believe it was so stupidly simple.

There's a recipe that I recently posted for creamy chicken and stuffing casserole that's very similar.  It's a bit of an old standby, but I do believe it's been pushed out of the roster by this new recipe.  The combination of cornbread stuffing, sweet apricot preserves, and tender chicken is just awesome.  Just sweet enough without rendering the chicken a sugary mess.  Perfect.

I did run into a conundrum while making the stuffing.  The recipe tells you to make the stuffing as directed on the package, and the package that I used (Pepperidge Farms) called for an additional two ingredients: diced onion and chopped celery.  Zut alors.  This means that my four ingredient recipe would then become a 6 ingredient recipe.  And is that what they meant by following the package directions?  It's rather weird that I'm sometimes so literal as I consider myself to be pretty creative.  So as usual, I suggest you do whatever you want to do.  I added the onions and celery and am very happy that I did.  The stuffing was "let's have seconds" good.

Yes, that's a good way to put it.  Let's have seconds.  In fact, let's make two more crockpots of this concoction and have have thirds.

Friday, February 25, 2011

Quesadilla Casserole

Oh what to make, what to make for Meatless Monday?  With good farmer's market produce months away, it's starting to get difficult to find things that interest me.  I've overlooked this recipe for Quesadilla Casserole for a long time now, but figured, why not?  Looks easy enough, we all like beans...let's give it a try.

Quesadilla Casserole

3 tbsp vegetable oil
3/4 cup chopped onion
1 29-oz can black beans, drained, 1/2 cup liquid reserved
1 1/2 cups frozen corn kernels, thawed
1/2 cup flat-leaf parsley
Five 10-inch flour tortillas
8 oz monterey jack cheese, shredded
1 cup store-bought green enchilada sauce

1.  Preheat oven to 400 degrees F.  In a skillet, heat the oil over medium heat.  Add the onion and cook for 5 minutes.  Add 1 1/2 cups black beans and mash into a chunky paste.  Stir in the reserved liquid.

2.  Grease a heavy, ovenproof skillet.  In a bowl, combine the corn, parsley and remaining black beans.  Place a tortilla in the skillet and spread with 1/3 cup mashed black bean mixture and 1/2 cup cheese.  Press to compress layers.  Repeat with the remaining tortillas, mashed black beans, corn-bean mixture and cheese.  Bake until the cheese is melted and the casserole is heated through, about 30 minutes.  Transfer to the broiler and cook for 1 minute.  Serve with the enchilada sauce.


The Verdict:  It's pretty yummy!  But the little smatterings of green...toddler hated it.

So I'm starting to learn how to un-green my kiddos food.  It's really difficult to write a recipe blog when your 2.5-year-old is going through the "assert-myself-in-weird-ways" stage, which for him includes the green aversion.  (Doubly hard with an engineer husband whose adjectives are different versions of "good" or "I like it.")  Oh, and in case you're thinking "Of course the kid didn't eat that green stuff!" I only put the sauce on my husband's and my quesadilla.

I don't know that I actually used five tortillas to make this recipe.  I think I only used 3 or 4.  For some reason, each time I'd read the directions, I was seeing to use a third of the bean mixture, not 1/3 of a cup.  If you use them all, you're a rock star.  If you don't, you're hooked on phonics like me and that's OK.  It still turned out really good.

Another confession: my supermarket didn't have green enchilada sauce.  After spending too long scouring the Tex-Mex part of the aisle, I just shrugged my shoulders and bought green taco sauce.  Does it make a difference?  I don't know.  I buy salsa verde all the time, but couldn't tell you the difference between taco and enchilada sauce.  If you'd like to give me a tutorial, feel free to drop me a line. 

I enjoyed this recipe a lot.  What's not to like?  Beans, corn, and cheese...and cheese that got to hang out under the broiler?  That's a winner in my book.  It did take a bit of time to prepare, which isn't always the best choice for a weeknight with a small child.  But good stuff.