Tuesday, November 30, 2010

Pasta with Squash, Brown Butter and Rosemary


In my attempt to buy on sale, I decided to use this Pasta with Squash, Brown Butter and Rosemary recipe from Rachael Ray since butternut squash was 39 cents a pound at Whole Foods last week. I looked at two different supermarkets for fresh rosemary and didn't find any at either, which is funny as I hardly ever use fresh herbs. So suffice it to say, you can use dried rosemary as a substitute when making this.

Pasta with Squash, Brown Butter and Rosemary

One 3-lb butternut squash--peeled, seeded and cut into 1/2-inch cubes
1 onion, chopped
2 1/2 tbsp extra-virgin olive oil
1 1/2 tbsp chopped fresh rosemary (approx. 2 tsp dried)
salt and pepper
2/3 lb lasagna noodles, broken into pieces
4 tbsp butter
1 tsp fresh lemon juice
1/2 cup grated parmesan cheese
3 tbsp toasted pine nuts (optional)

1. Preheat the oven to 400 degrees. In a large bowl, toss the squash, onion, olive oil and rosemary; season with salt and pepper. Place on a baking sheet and roast until the squash is tender, about 30 minutes.

2. Meanwhile, in a large pot of boiling, salted water, cook the pasta until al dente; drain and transfer to a large bowl.

3. In a small skillet, melt the butter over medium heat and cook, stirring occasionally, until golden, about 7 minutes. Stir in the lemon juice.

4. Add the roasted squash, brown butter and 1/3 cup parmesan to the pasta and toss; season with salt and pepper. Top with the pine nuts and remaining parmesan.

The Verdict: My husband and son both liked it because they were oblivious to my faux pas. As the cook, I'd probably like it better if it weren't Pasta with Squash, Black Butter and Rosemary.

Yes, I burned the butter. I made this dish earlier in the day so that I could bring my toddler out for the afternoon. Of course, to foil my plan, he decided it was a no-nap day. So whilst trying to entertain him, cook, and write an email on my Blackberry, something had to give. And it was the butter, which quickly went from a lovely, rich brown to a witch's brew that spat angrily when I added the lemon. So there's a heads up--keep a closer eye than I did on your butter!

Luckily, the butter looked like it was flecked with pepper and didn't taste charred.

The roasted butternut squash was absolutely delicious, and surprisingly, my kiddo ate it as well. His father billed it as "pumpkin" which seemed to pique his interest. Not sure why, but it did.

I found the 2/3 of a pound of pasta ingredient to be a bit tedious--what exactly is 2/3 of a pound of pasta? Before sweating it too much, I decided I didn't care. I had two boxes of leftover lasagna noodles and quite a few large pasta shells. Worked for us. Here's a kitchen tip--if you have a recipe asking for large broken noodles, put them in a freezer bag and gently hammer them with a meat mallet. Took me a while to figure this out personally. Instead, I dealt with shards of razor-like pasta flying through the kitchen and precariously close to my eyes many times before this "a-ha" moment.

This dish is simple, easy (overlooking the butter), and feels like fall. It's a great, filling vegetarian dish.


Monday, November 29, 2010

Beef and Pinto Bean Chili


This week, instead of choosing recipes first, I scanned the circular for the local supermarket to see what was on sale. After getting an idea of what meats and main staples were available, I chose dishes from this information. What's funny is that I didn't save a dime. Well, for the time being anyway. One of the items I bought was a 3+ pound chuck roast. With it, I was able to nearly double this recipe for Beef and Pinto Bean Chili. We ate it for dinner last night, sent some with my husband for lunch today, and froze the rest. I also have another pound and a half of meat to make another recipe. So hopefully, in the long run, I've created some kind of grocery savings.

This chili recipe comes from the January/February 2010 issue of Cooking Light.

Beef and Pinto Bean Chili

A note on spiciness: You can make this chili as spicy as you wish. For a spicy chili, use the 1/4 cup of minced jalapeño peppers (about 2 large) with the seeds. Sour cream will help to create a cooling effect. My husband and toddler don't enjoy spicy foods, so I chose to use one jalapeño with the seeds scraped out, allowing the chili to have the jalapeño flavor without the heat. Remember: the more peppers with seeds you use, the hotter the chili.

Cooking spray
1 pound boneless chuck roast, trimmed and cut into 1-inch pieces
3/4 tsp salt, divided
2 tbsp canola oil
4 cups chopped onion (about 2 medium)
1/4 cup minced jalapeño peppers (about 2 large)
10 garlic cloves, minced
1 (12-oz) bottle beer
1 tbsp paprika
1 tbsp ground cumin
2 tbsp tomato paste
3 cups fat-free, less sodium beef broth
1 (28-oz) can whole peeled tomatoes, drained and chopped
1 (15-oz) can pinto beans, rinsed and drained
1/2 cup thinly sliced radish
1 avocado, peeled, seeded, and chopped
6 tbsp small cilantro leaves
6 tbsp sour cream
6 lime wedges

1. Heat a Dutch oven over high heat. Coat pan with cooking spray. Sprinkle beef evenly with 1/4 tsp of salt. Add beef to pan; sauté 5 minutes, turning to brown on all sides. Remove from pan. Add oil to pan; swirl to coat. Add onions and jalapeño; sauté 8 minutes or until lightly browned, stirring occasionally. Add garlic; sauté 1 minute, stirring constantly. Stir in beer, scraping pan to loosen browned bits; bring to a boil. Cook until liquid almost evaporates (about 10 minutes), stirring occasionally. Stir in paprika, cumin, and tomato paste; cook 1 minute, stirring frequently. Add broth, tomatoes, beans and meat; bring to a boil. Reduce heat, and simmer 1 1/2 hours or until mixture is thick and beef is very tender, stirring occasionally. Stir in remaining 1/2 tsp of salt.

2. Garnish one cup of chili per bowl by equally dividing radish and avocado. Top each serving with 1 tablespoon of cilantro and 1 tablespoon of sour cream. Serve with lime wedges.

The Verdict: If you'd have asked me if I'd ever made chili before dinner last night, I'd have answered "of course." If you ask me now if I've ever made chili before, the answer is not before yesterday. This is chili. This makes me finally understand the rationale behind things like chili cook-offs.

The tlc you put into this chili raises it up to an almost beef Burgundy or coq au vin status. It takes work to create it. And like those famous French stews, this chili is created with many simple ingredients, in many simple steps. This kitchen dance creates layers of complex flavor.

Not surprisingly, the entire family enjoyed it.

This is not a throw-together after work chili. You'd probably want to make it on a weekend. And like good stews, I'm going to guess that if you made it Sunday afternoon for Monday or Tuesday's dinner, it would be even better as the flavors have even more time to mingle.

Love it. Good stuff.

Sunday, November 28, 2010

Huevos Rancheros


When I came across this recipe, which first appeared in Good Housekeeping, I tagged it as a potential family meal. I've had some great huevos rancheros (ranch eggs) and thought this version looked easy and healthy.

Huevos Rancheros

4 (6-inch) corn tortillas
nonstick cooking spray
1 jar (16-oz) mild fat-free salsa
1 cup canned black beans, rinsed and drained
1 cup frozen corn kernels
3 green onions, sliced
1 tsp ground cumin
4 large eggs
1/2 cup loosely packed fresh cilantro leaves, thinly sliced
1/2 avocado, sliced into thin wedges

1. Preheat oven to 350 degrees. In a 15 1/2- by 10 1/2-inch jelly roll pan, invert four 6-ounce custard cups. With kitchen shears, make four evenly spaced 1-inch cuts, from edge toward center, around each tortilla. Lightly spray both sides of tortillas with cooking spray and drape each over a custard cup. Bake tortilla cups 8 minutes or until golden and crisp.

2. Meanwhile, in a nonstick skillet, combine salsa, beans, corn, green onions, and ground cumin; heat to boiling over medium heat. Cover and cook 3 minutes to blend flavors.

3. With large spoon, make 4 indentations for the eggs in salsa mixture, spacing them evenly around skillet. One at a time, break eggs into a cup, then slip the egg into an indentation in salsa mixture. Cover and simmer 8 to 10 minutes or until eggs are set or cooked to desired doneness.

4. To serve, invert each tortilla cup onto a plate. Spoon an egg with some salsa mixture into each tortilla cup. Spoon any remaining salsa mixture around and on eggs in cups. Sprinkle with cilantro; serve with avocado slices.

The Verdict: Good, easy, but not the recipe I was hoping for.
My husband liked it and my son ate it as well. I ate it and liked it, too, but just felt that something was missing. If you Google "huevos rancheros" about a trillion recipes pop up. Many call for something a little more than just salsa, beans and corn--whether it be a homemade salsa simmered in chicken stock, covered in green chile sauce, or embellished with smoky chiles in adobo. This lacked pop.

I did like that it was open this, dump that, toss in eggs and walk away. It's always smart to have some easy recipes in your arsenal.

Two thoughts on the recipe: First, when it asks to make indentations with your spoon, don't be too frustrated that you can't. Unless your salsa was super-chunky, you've got a lot of wet in your skillet. You are basically pushing the solid ingredients aside under a layer of tomato sauce. That's perfect. You're just trying to make sure the eggs don't melt into one four-yolked monster. Secondly, corn tortillas are a lot less pliable than a flour-based tortilla. The cuts and the cooking spray will help to "drape" the tortillas over the custard cups, but don't get it in your head that you're going to make corn cups. They will flop enough to hold your salsa and eggs; leave it at that.

So I'm not sure. I think I'll continue to find a huevos rancheros recipe that really wows me over.

Friday, November 26, 2010

Chicken in Lettuce Cups


It was Thanksgiving here in the U.S. yesterday, which meant for this American I could be thankful for not having to cook. My aunt, with the help of my uncle, roasted a giant turkey for ten of us. It came out beautifully brown and incredibly moist. Add to that lots of fall sides like mashed turnip and succulent stuffing, it was a Happy Thanksgiving indeed.

But before the holiday, we here at our house tried a new recipe that first appeared in Good Housekeeping: Chicken in Lettuce Cups. It's a simple stir fry served in large leaves of Boston lettuce. My ingredient amounts differ slightly from the original recipe.

Chicken in Lettuce Cups

3 tbsp reduced-sodium soy sauce
2 tsp grated peeled fresh ginger
1 tbsp honey
2 tsp toasted sesame oil
1 1/4 lbs chicken tenders, cut into 1/4-inch chunks
1 cup frozen shelled edamame
2 medium stalks celery, chopped
12 large Boston lettuce leaves

1. In cup, combine soy sauce, ginger and honey. Set aside.

2. In a 12-inch nonstick skillet, heat sesame oil on medium for 1 minute. Add chicken chunks and cook for 5 minutes, stirring occasionally.

3. Add edamame to chicken in skillet; cook 3 minutes, stirring occasionally. Stir in celery; cook 3 minutes longer. Add soy sauce mixture; cook 2 minutes or until chicken is cooked through; stirring occasionally to coat chicken in sauce.

4. Arrange lettuce leaves on dinner plates. Divide chicken mixture among lettuce leaves, about 1/4 cup per leaf. Fold leaves over chicken mixture and eat out of hand.

The Verdict: Fun, delicious and easy!

My husband and I both liked the taste of this simple stir fry and loved the idea of wrapping the chicken around a lettuce leaf. My son's hand were too small to successfully eat the stir-fry wrapped in the lettuce and I don't think he was into the idea of eating a big green leaf anyway. No matter, the stir fry itself had lots of edamame and celery, giving him plenty of vegetables.

I didn't bother to divide the lettuce leaves among our plates. Instead, I just brought a plate of lettuce and the stir-fry in a bowl and served it family style.

This was much better than Chinese take out!

Wednesday, November 24, 2010

Lahana Sarma (Stuffed Cabbage Rolls)


Although this is a Turkish dish, you probably can find an equivalent in most cultures. I remember my mom making this growing up, though I think our stuffed cabbage rolls were topped with tomato sauce.

One difference is the use of dill. Dill is a favorite spice in Turkey. I hardly use fresh herbs in cooking, but this is one I'd suggest making the effort for. Dill is so aromatic and flavorful; a little goes a long way.

Lahana Sarma (Stuffed Cabbage Rolls)

1 large savoy cabbage
1/2 cup cooked brown rice
1 small onion, diced
2 tsp chopped dill
1 tsp dried tarragon
1/2 lb ground lamb
1/2 lb ground beef
salt and pepper to taste

1. Cook brown rice as directed on package. Set aside and let cool.

2. Remove outer leaves from the cabbage and submerge the rest of the cabbage for 10 minutes in boiling water. Immediately submerge in a bowl of ice water to stop the cooking process.

3. In a large bowl, combine ground meats with onion, dill, tarragon, rice, and salt and pepper. Mix well.

4. Drain cabbage and remove leaves. Flatten the leaves out on a cutting board and remove the tough center ribs. You should have two pieces of cabbage for rolling after doing this.

5. Make small sausage-shapes with the meat mixture and place one on each cabbage leaf. Roll the leaf, folding the ends inside as you work. Place in a large pot and add water; enough to cover cabbage rolls about halfway. Cook on medium until water begins to boil, then turn heat down to a simmer. Cook for approximately 40 minutes, watching to assure that cabbage does not disintegrate. Arrange on a serving dish and serve immediately.

The Verdict: The cabbage rolls end up being a little over two inches long each. It's fun to have a square meal--meat, vegetable and rice--in one little package.
Because I usually use brown rice, I would suggest cooking your rice first if that's your choice as well. This recipe called for soaking the rice for 30 minutes only, which I did, and it didn't cook thoroughly. It might work for white rice, but coarser brown did not.

I would suggest buying a large cabbage so that you have larger leaves to work with. You may not use the entire cabbage, but at least you won't be trying to create cabbage origami with tiny leaves. You can always save the extra cabbage for side dish later in the week. If you find that your cabbage is still raw as you get towards the middle, you may wish to blanch it a second time for a shorter cooking time.

For a different spin, and an extra vegetable, you can top your rolls with a mixture of a can of tomato sauce, a can of diced tomatoes, a tablespoon of sugar and a splash of vinegar. Place the cabbage rolls into a large baking dish, ladle the tomato mixture on the top of each roll, then add water so that it covers the rolls to about halfway up their sides. Bake, uncovered, in a preheated 350 degree oven.

Tuesday, November 23, 2010

Lahmacun (Turkish Pizza)


Lahmacun (pronounced lah-mah-jhoon) is probably the only recipe that calls for copious amounts of parsley that I love. For whatever reason, the mix of meats, vegetables and spices seems to negate some of that sharp parsley taste that disagrees with me.

Lahmacun is a very thin pizza without cheese. It's topped with ground lamb, onions, garlic, parsley and spices, then baked until golden brown. You can use store bought pizza dough, or if you have a bread machine, you can make your own. (You can, of course, make your own without a bread machine but I like dumping it all the ingredients into one place and letting it do all the work for me.) My pizza dough recipe comes from The Bread Lover's Bread Machine Cookbook. I highly recommend this book to anyone who enjoys homemade bread. Furthermore, Beth Hensperger suggests using SAF yeast when making breads. After some experimentation, I've come to realize she knows what she's talking about. If you're going to make your own anything in the bread machine, get yourself a bag of this yeast. It lasts forever and makes beautiful doughs and breads.

The recipe for lahmacun is a combination of many different recipes. If you find that you like lahmacun, play with the ingredients yourself. Just remember to stretch your dough very, very thinly to create very thin crust. It still tastes great with a thicker crust, but it's not as authentic.

Beware! This makes a LOT of pizza--six or eight smallish pizzas! Because it's thin, more than likely you'll eat one per adult. But with a small family, you'll definitely have leftovers.

Lahmacun
For the dough:
1 1/3 cups water
1/4 cup extra-virgin olive oil
3 1/2 cups unbleached all-purpose flour
1 tbsp sugar
1 1/2 tsp salt
2 tsp SAF yeast or 2 1/2 tsp bread machine yeast

1. Add ingredients to your bread machine according to the manufacturer's directions. Set to dough cycle. Take out of the machine immediately and divide into desired number of portions. Flatten each portion into a disc. Cover with a damp towel and let rest for 30 minutes until the dough has increased in size by 20%.

2. Roll out and shape dough. Lahmacun are not perfectly round, so the more lopsided, the better. Or place dough in plastic food storage bags and refridgerate for up to 24 hours. To use, let rest for 20 minutes at room temperature before rolling out.

For the lahmacun topping:
1 lb ground lamb (or 1/2 lb ground lamb, 1/2 lb ground beef)
1 large onion, finely chopped
2 tbsp garlic, chopped
2 tbsp olive oil
1 bunch parsley, finely chopped
1 large tomato, peeled and finely chopped
2 tbsp tomato paste
1/2 jalapeño pepper, finely chopped
1 tsp cumin
1 tsp chili pepper
salt and pepper to taste

1. Preheat oven to 425 degrees. Heat olive oil in a skillet and add onion and garlic. Cook until onion is translucent. Set aside and let cool.

2. In a large bowl, combine rest of ingredients as well as onion and garlic mixture. Mix very well until mixture resembles a thick paste.

3. Roll out dough into ovals that are approximately 6-x 8-inches in diameter. Spread about 4-5 heaping tablespoons of lamb mixture over each. Place one or two on a large cookie sheet (whatever fits) and cook for 10-15 minutes; crust should be golden brown and topping should be browned as well. Cover cooked lahmacun with a towel as subsequent pizzas are cooked. Serve immediately.

The Verdict: Gosh, these are yummy. Like, "my belly hurts because I didn't stop eating in time" yummy.

Kind of like pancakes, I find that my first couple of crusts that I roll out aren't quite right. In my case, they're too thick. But like I mentioned above, while that's not traditional, it still tastes fantastic.

My husband and I both enjoyed them immensely (hence "my belly hurts"...although that might just have been me) and my son ate a couple of small slices. He recognized it as pizza by site, but his American senses weren't fooled by taste. The excitement of pizza for dinner quickly faded. If you have a child who loves pizza, call it lahmacun to avoid any disappointment.

I know some people see lamb as an ingredient and keep searching for a dinner recipe. Before you dismiss this because of that, consider making it with just ground beef. I've even made it with ground turkey before. While I try to limit our lamb consumption (yeah, I'm one of those suckers who can't separate "but it's a lamb--a fluffy, cute lamb!"), I do still love it. And if given the choice of turkey or lamb, I'm going to choose lamb. That slightly gamey flavor is part of the appeal of the dish.

Sunday, November 21, 2010

Lebanese Eggs with Sumac

From Washington, DC to Ethiopia to Lebanon in 10 minutes. Ready?


On Friday afternoon, I was watching Anthony Bourdain's No Reservations with Amir. Bourdain is probably not the most appropriate viewing for a 2-year-old, but since this isn't a parenting blog, we won't go there. Anyhow, he was visiting and eating his way around Washington, DC. He and his companion are at one point dining in an Ethiopian restaurant, eating raw grass-fed beef with injera, the spongy bread served with Ethiopian meals. The injera (but definitely not the raw meat) make me suddenly hungry for doro wat, a really fantastic stew. So I hunt down my The Frugal Gourmet On Our Immigrant Ancestors cookbook.


You may remember Jeff Smith, or the Frugal Gourmet, as the funny-voiced PBS cook who fell from grace in the early '90's and died a few years later. Whether the allegations brought against him were true or not, I loved watching him cook and have quite a few of his recipes I go back to time and again. Unfortunately, his recipe for doro wat was too complex for my taste, so I began flipping through the book, landing on a recipe for eggs fried in oil with sumac.


See the world tour?


Anyway, I love sumac and have sumac but hardly ever use sumac. No, it's not made from poison sumac, the stuff you find in your backyard that makes you itch like poison ivy. They are related, but the spice comes from the berry of a different plant. It's a beautiful dark red color and the taste is hard to describe. Smith calls it "tart and tangy," good adjectives. But there aren't too many recipes that call for it. So with extra eggs around for holiday baking, I thought this easy recipe was just the ticket for a lazy Sunday dinner.

Lebanese Eggs with Sumac

4 tbsp olive oil
4-6 eggs, depending on how many you're serving
1 tbsp sumac
salt and freshly ground pepper to taste

1. Heat a 12-inch nonstick skillet and add the oil. Break the eggs into the oil, being careful not to break the yolks. Sprinkle the sumac and salt and pepper on top. Cover and slowly cook until done to taste. Serve with fresh pita bread.

The Verdict: Nothing to write home about, but definitely easy and something new to do with my jar of sumac.

There's not much else to say about this recipe. I made five eggs; two for each adult and one for the kiddo. I wanted my yolk runny, my husband's slightly runny, and my son's hard. Kind of impossible when five eggs have cooked together in a pan. Ironically, my son's egg was the runniest of all.

Pita bread is not only delicious, but the authentic choice. If you have no pita bread on hand, you can obviously serve with whatever bread, toasted or not, that your family enjoys.

I forgot to take pictures again last night but I think that's OK; my guess is you've all seen a fried egg before! Oh and last night was meatless Sunday as we'll be eating meat for the rest of the week. We were lucky enough to have lunch with my husband's friends yesterday and they are both vegetarians from Southern India. The wife made homemade dosas which were amazing. We'll have to see if that recipe will eventually make it to the roster...

Friday, November 19, 2010

Mediterranean Hummus


This recipe is another from Cuisine. I've never made my own hummus, so I'm not sure what made me stop and look at this. Afterall, it's yummy, cheap and minimally processed at most stores. It also calls for tanhini, and while there's nothing wrong with tahini, I've just never had any reason to buy any. It's one of those ingredients that costs too much for what you need it for.

But it must have caught my eye that instead of tahini, you can use sesame oil? Really? I have that. I keep it on hand for stir fries and marinades. And for the cost of two cans of chick peas (ha, I started to type "cheap peas," a definite slip as to what I'm thinking!), you can make a load of delicious hummus. Sold!

Mediterranean Hummus

2 cans chickpeas, drained and rinsed (15 oz each)
1/4 cup fresh lemon juice
1/4 cup olive oil
3 tbsp tahini or 1 tsp roasted sesame oil
1 tsp minced garlic
1 tsp ground cumin
1/4 tsp cayenne pepper
salt to taste

1. Purée chickpeas, lemon juice, oil, tahini, garlic, cumin and cayenne in a food processor until smooth; season with salt.
2. Transfer to a serving bowl. If desired, drizzle with olive oil and garnish with paprika and parsley.

The Verdict: Holy moley! Easy! Yummy! Cheap! Delicious!
Did i say how much we liked this? I don't know why I thought hummus would be so much work, but it isn't. As I prepared the rest of dinner, my son and I munched on this giant mound of hummus on cucumbers, pretzels and goldfish crackers. And when Daddy got home, we ate more with our fish cakes.

I'm still smiling.


Fish Cakes


Really, this recipe is called Lemon-Parsley Fish Cakes. But as you might recall, I'm not a fan of fresh parsley. And calling them Lemon Fish Cakes would be weird. Who wants to eat fish that has equal parts lemon? (It doesn't, but that's what the name implies.) So we'll just call it Fish Cakes, nice and simple.

Fish Cakes

1 lb fresh white fish, such as pollock or cod
2 tbsp olive oil
1 large egg, lightly beaten
1/4 cup thinly sliced scallions
2 tbsp mayonnaise
1 tbsp lemon juice
2 tbsp Dijon mustard
6 tbsp breadcrumbs
3 tbsp chopped fresh parsley (optional)
coarse salt and ground pepper

1. Preheat oven to 400 degrees. Place fish in baking dish; rub with 1 tbsp oil. Roast fish in the oven until cooked through, 15-20 minutes. Let cool completely, then pat dry with paper towels. Flake with fork.

2. In a large bowl, combine fish, egg, scallions, mayonnaise, lemon juice, mustard, breadcrumbs, parsley, salt and pepper. Mix gently until ingredients just hold together. Form mixture into eight equal-sized patties.

3. Heat 1 tbsp oil in a large, nonstick skillet oven medium heat. Cook cakes until golden brown, about 2 minutes on each side. Serve hot.

4. Before cooking, cakes can also be frozen for later use. Freeze on a baking sheet until firm, then wrap each in plastic and store in resealable freezer bags, up to one month. Thaw before cooking and follow step #3.

The Verdict: Light and tasty! Each of us liked them.

I think my favorite part of them is the hint of Dijon mustard. The fish itself is mild, so that slight kick really works to add some pizazz.

The only part about this recipe, and I'm willing to guess it isn't the recipe exactly as I've made these before, was that they fell apart. The three in the photo you see are the three that made it in one piece. I think the others fell apart because of a number of reasons, including adding them to the pan before it was hot enough and crowding them together. Both no-nos. I also need a new skillet. Ah, how ironic. I blog constantly about food and recipes, yet have sub-par cookery.

These would be great with a spinach salad. We had ours with sliced cucumbers and homemade hummus. That recipe to follow...and it's a keeper!

Wednesday, November 17, 2010

Slow Cooker Baked Beans

I was very worried about dinner last night. In addition to beans in the slow cooker, we were to have spiced apple chicken sausage. I don't have a problem with baked beans and sausage, but after my toddler's proclamations of "Me no like sausage! Me no like beans!" at dinner last night, I thought we were in for a fight. I had eight hours in which to mentally prepare.


Slow Cooker Baked Beans

1 (16-oz) package dried navy beans
1 cup chopped onion
1/4 cup molasses
3/4 cup ketchup
1/4 cup firmly packed dark brown sugar
1 tsp salt
1/2 tsp dried mustard
1/2 tsp ground black pepper
1/2 lb bacon

1. Rinse and sort beans. In a large saucepan, cover with water 2 inches above beans; let soak for 8 hours. Drain, reserving liquid. Bring beans to a boil in soaking liquid; reduce heat, and simmer 1 hour. Drain beans, reserving liquid.

2. Stir together onion, molasses, ketchup, brown sugar, salt, dry mustard, and pepper. Cut each bacon strip into 3 pieces. Place beans, bacon, and molasses mixture in a slow cooker, and cook on high for 1 hour. Reduce heat to low and cook 8 hours or until beans are tender, adding reserved bean liquid if necessary.

The Verdict: Whatever nasty things I've said about my crock pot in the past, I'll take back because it's an imperative tool to creating these fantastic beans. Oh, and Picky Cookie Monster shoved his father's hand away when he tried to feed him chicken sausage and said, "Me eat my beans. I eat just beans."

When I first put this recipe together, I was nonplussed as to how this pink, watery concoction would magically transform into baked beans. Baked beans are gooey and almost brick red. These beans were sickly pale and swimming in ketchup water. I also didn't think the ingredient amounts were going to cut it for any flavor. But having faith in the adorable Paula Deen, where this recipe originates, I patiently checked on bean progress all day.

I'm glad I did.

They were every bit as tasty, ooey-gooey, and dark caramelized bean and molasses mixture as I remember my mother's baked beans as being. In fact, the recipe says that it makes 6 to 8 servings--or it makes two servings for your husband and son and one big-ass serving for yourself. No, I didn't eat the entire crock. But I could have.

I did find that I used all of the reserved bean liquid. This was slightly annoying as the whole point of crock pot cooking is not having to babysit your food. Perhaps I'll start by using half of the liquid when I turn the temperature down to low the next time I make it. (I know my aunt's recipe calls for 8 cups of water from the get-go.) I'll let you know...because there will definitely be a next time!

By the way, I just hooked up my camera to upload my bean pictures and discovered they weren't there! Wah! I'm not sure what happened and I apologize for the lack of picture.

Tuesday, November 16, 2010

Chicken Feijoada


If you Google "national dish of Brazil", page after page comes up for feijoada (pronounced fay-ZHWAH-duh). It's a stew traditionally made of sausage, meat and beans served with a side of collard greens. I don't claim to know a thing about Brazilian cuisine but funny enough, the one time I ate dinner at a Brazilian family's house, feijoada was served.

From what I can gather, this recipe from Cuisine isn't quite the time-honored version that you'd find in Rio de Janeiro. First, it's made with shredded chicken instead of pork and beef. More specifically, you're looking at pig ears and feet as well as beef tongue. And instead of a dutch oven, traditionally it's cooked in a clay pot. Still, it looked delicious. And since my family doesn't eat pork, chicken, turkey bacon and beef kielbasa is a good trade-off.
Chicken Feijoada

3 strips turkey bacon, diced
1/2 lb kielbasa, sliced into 1/2-inch rounds
2 cups diced onion
1 tbsp minced garlic
1/4 cup dry white wine
2 cans black beans, drained and rinsed separately (15 oz each)
4 cups low-sodium chicken broth
1 can diced tomatoes in juice (14.5 oz)
1/2 dry converted white rice
1/2 lb shredded cooked chicken
4 cups stemmed and chopped collard greens
1 tbsp olive oil
salt to taste
orange wedges (optional)
sliced jalapeños (optional)

1. Cook bacon in a dutch oven or large pot over medium heat until crisp; drain on a paper-towel-lined plate. Add kielbasa to drippings, sauté until brown, 6 minutes, then drain along with the bacon. Pour off all but 1 tbsp drippings, stir in onion, garlic, and chili powder; sweat until onion is soft, about 6 minutes.
2. Deglaze pot with wine and simmer until nearly evaporated. Purée 1 can of beans in a blender or food processor, then add to the pot with the remaining whole beans, reserved bacon and kielbasa, broth, tomatoes, rice and chicken. Bring stew to a boil, reduce heat to medium-low, and simmer stew 20 minutes. For a thicker stew, turn heat down to low and cook for 1 to 2 hours.
3. Sauté greens in oil in a nonstick skillet over medium-high heat until wilted, 2-3 minutes. Add greens to stew and season with salt.
4. Garnish each serving with orange wedges and jalapeño slices.

The Verdict: Depends on who you talk to.
I thought it was delicious. The turkey bacon and kielbasa lent a smoky flavor to a very busy dish. I decided that the 20 minutes cook time the recipe called for was not nearly enough as the consistency was too soupy. So I turned the heat down to low and let the liquid thicken which coated the ingredients nicely in a rich sauce. I loved that despite all the meat, each bite was filled with beans and vegetables, too.

My husband's first reaction was that it "looked like a disaster." (Thanks, honey!) There is a lot going on in this stew to merit this response. But after he tasted it, he declared it was "good."

Our son, however, was like eating dinner with picky Cookie Monster. First he declared, "Me no like sausage." Then it was, "Me no like spinch." (That's spinach for those of you who are without toddlers--and by the way, there was no spinach in this dish.) Then we got, "Me no like tomatoes" followed by "me no like beans." (Since when?!) He did inform us that "I like chicken," abandoning Toddler Caveman-Speak and eating every speck of chicken on his plate. Sigh.

I left out the jalapeños because none of us are gigantic fans of obviously hot. But they do make the dish very pretty.

This makes a lot of stew. Invite friends over or prepare for leftovers.


Monday, November 15, 2010

Fagioli-on-Toast


Tonight's dinner couldn't have been a better pick. I feel horrible and couldn't bear the idea of cooking anything elaborate. This meal is about one step above difficultly than pouring cereal in a bowl. It's also vegetarian. A winner on all fronts.


Fagioli-on-Toast

4 thick slices country bread
4 tbsp olive oil
2 garlic cloves, peeled and sliced
1 whole garlic clove
1 tsp dried sage
1 28-oz can diced tomatoes
2 15-oz cans cannellini beans, rinsed and drained
1/2 cup vegetable stock
1/2 tsp salt
1/4 tsp freshly ground pepper

1. Heat oven to a high broil. Brush each slice of bread with 2 tablespoons of the olive oil. Toast the slices under the broiler until crusty and golden, about 1 minute each side. Lightly rub the whole garlic clove on each slice.

2. Heat the remaining oil in a large skillet, then add sliced garlic and sage until garlic begins to brown, about 1 minute.

3. Add the tomatoes, beans, stock, salt and pepper. Stir to combine. Cook until the liquid is reduced and the soup is slightly thickened, a few minutes more.

4. Serve, placing a slice of toast into each bowl then generously spooning the beans and broth over the bread.

The Verdict: Easy peasy, simple, filling and delicious. My son had other ideas, however. He has decided that he now hates tomatoes and spent the entire dinnertime dodging red bits in his bowl.

Toddler pickiness aside, this really is a great go-to meal. It took me less than 10 minutes from stove to table. It's obviously nothing complex--in preparation or in taste--but it's hearty. And cheap.

To be honest, I didn't have any vegetable stock. I don't ever have vegetable stock, though when I have dregs of leftover vegetables on hand, I often think of making some. I've yet to do it, so this means that meatless Monday wasn't entirely meatless as I used chicken stock. So sue me. Feel free to make the switch as well if you care to.

Sunday, November 14, 2010

Braised Radishes and Paprika Oven Fries


Since I'll be attempting the national dish of Brazil later in the week, I need chicken meat. So dinner is Julia Child's poulet rôti, a recipe I shared a while back. But rather than leave everyone hanging...what else did the Kinaymans eat this weekend?...I'm sharing two sides: one is an old favorite of mine, the other is a new attempt. (You do worry about things like global warming, the economy and what my family eats on a regular basis, right?)
The old favorite is braised radishes. I ate a lot of radishes growing up, fresh from my neighbor's garden, sliced and in a green salad. I never particularly cared for their spicy flavor because that's all they had going for them: heat. I had no idea that you can actually cook with them until I saw Rachael Ray braising some on an episode of 30 Minute Meals. Suddenly, one-dimensional radishes took a turn.
The other recipe looked simple and consisted of everything I had on hand. Paprika oven fries are seasoned potatoes slow roasted in the oven.
Braised Radishes

2 bunches radishes, about 1 pound, trimmed of tops and roots
1 1/2 cups chicken stock
2 tbsp butter, cut into bits
1 large shallot, thinly sliced
2 tbsp sugar
1 tbsp red wine vinegar
salt and pepper

1. Place radishes in a skillet with stock, butter bits, shallots, sugar, vinegar, salt and pepper. Cover the pan and reduce heat to medium. Cook radishes 10 to 12 minutes and if the stock has not cooked away, remove radishes and cook down to 1/2 cup, about 2 minutes.


Paprika Oven Fries

3 large potatoes
3 tbsp canola oil
2 tsp paprika
salt and pepper

1. Preheat oven to 450 degrees. Cut potatoes into 1-inch-wide wedges. Transfer to a rimmed baking sheet, toss potatoes with oil, paprika, salt and pepper.

2. Bake potatoes in a single layer, cut side down, until they loosen easily from the sheet, about 25 minutes. Turn the potatoes, continue to bake them until fork-tender and crisp, 25-30 minutes more.

The Verdict: A different response to each vegetable.
Let's start with the radishes. I love these radishes. When cooked, radishes take on a cruciferous vegetable taste, very much like brussel sprouts. To many, that statement right there is a deal-breaker. But if you like those vegetables, you'll like this dish. (Oh, and by the way, I just looked it up: radishes are, indeed, a cruciferous vegetable themselves. Who knew? Not me. Learned something new today.)

The braising making the radishes lose a lot of their horseradish-like punch. Interestingly, braising them also makes them lose almost all of their red coloring. The liquid has a hint of sweet and was a great accompaniment to the roasted chicken, working well in lieu of a gravy.

I don't think my husband and son agree. My husband ate two and my son felt duped after gleefully shouting, "I want grapes, Daddy!" Nothing like a grape, honey.

The potatoes on the other hand turned the tables. Both husband and son ate those happily, while I munched on them dutifully. Honestly, I had to divide up the cooking time to allow for a family walk then the cooking of the chicken. They came out more like kettle chips which I don't think was supposed to happen. Maybe the difference of opinion was because I was expecting a steak fry while they didn't know what to expect.

The flavor was good; I would just caution that they can dry out. I don't think my wedges were quite 1-inch thick, so be warned that more meager cuts might lead to crispier potatoes.

Saturday, November 13, 2010

Mashed White Beans

This is the side I served with the Mini Skillet Meatloaves. It's four ingredients (aside from salt, pepper and water) and takes about 10 minutes to make. The kind of recipe I like--good food, easy to prepare.

Mashed White Beans

1 tbsp olive oil
2 minced garlic cloves
2 cans cannellini beans, rinsed and drained
1 tsp dried sage
1 cup water
salt and pepper

1. Heat olive oil over medium heat. Add garlic and cook until golden and fragrant, about 1 minute.

2. Increase the heat to medium-high. Add beans, sage and water. Cook, stirring often, until beans are hot and the liquid thickens, about 5 t0 7 minutes.

3. Mash beans, leaving some whole. Season with salt and pepper.

The Verdict: Super easy, super tasty. Even the toddler ate some.

This reminds me of an Italian version of refried beans. Cannellini beans are very flavorful, so simply adding sage, salt and pepper is perfect.

The original recipe calls for 1 1/4 cups of water. I found that before I mashed my beans, I took out nearly a cup of liquid. I'll have to make this recipe again to figure out the right amount of water to add; it might be more like 3/4 cup. If you think appears soupy, take out some of the liquid. But don't leave the beans dry; you need the liquid to mash them.

This side compliments lots of foods. And it was so easy, I think this might become a staple side dish.

Mini Skillet Meatloaves

So last night I had a choice to make. Get dinner on the table as quickly as possible with a sick, hungry and clinging toddler at my side, or set up for the nightly photo shoot. I chose the feeding the family. So I apologize for the lack of pictures for this recipe. If I make it again I'll edit this page to include one.

Since it was a week of vegetarian meals and fish stew, I thought that our resident carnivore 2-year-old deserved a hit of red meat. This Everyday with Rachael Ray recipe creates individual meatloaves topped with a sweet ketchup glaze.

Mini Skillet Meatloaves

1/3 cup breadcrumbs
1/3 cup milk
1/3 cup chopped fresh parsley
1 large egg
3 tbsp Worcestershire sauce
1 small onion, finely minced
1 tsp chili power
2 cloves garlic, grated or finely minced
1 1/2 pounds meatloaf mix (ground beef, pork, and/or veal)
Kosher salt and freshly ground black pepper
1 tbsp vegetable oil
1/2 cup ketchup
1 to 2 tbsp packed light brown sugar
1 tbsp apple cider vinegar

1. Mix the breadcrumbs, milk, parsley, egg, Worcestershire sauce, onion, chili powder and garlic in a large bowl. Add the meat and the salt and pepper, mix with hands until combined. From into 3-to 5-inch loaves.

2. Heat the vegetable oil in a large skillet over high heat. Add loaves and brown on each side for 3 minutes.

3. Meanwhile, mix ketchup, cider vinegar and brown sugar in a bowl. Brush a few tablespoons over each loaf when cooked, then add a 1/2 cup water to the pan. Cover and let cook for 15 minutes, or until loaves are cooked through.

4. Transfer meatloaves to a plate. Add the remaining sauce to the skillet, cooking for 3-5 minutes or until thickened. Pour over meatloaves and serve immediately.

The Verdict: These are called something. Wait...give me just a minute and I'll remember. Oh yeah: hamburgers!

Meh. My husband and I both liked them and Amir, in his typical meat-eating fashion, gobbled down one, ate part of mine and asked for more. But I didn't think there was anything particularly stunning about this recipe that makes me want to eat it again and again.

For me, I didn't enjoy the amount of parsley in it. I'm not a fan of parsley or cilantro, so every bite had that sharp and medicinal taste. I would use less if I make these again; if you like parsley, keep it the same.

While the meatloaves were OK, the side I served it with (Mashed White Beans) was very good. I'll post that separately.

Wednesday, November 10, 2010

Scallion Pancakes


I was pretty excited when I found this recipe. I love scallion pancakes but never thought about making them at home. It was even better that I found the recipe in Cuisine Light, suggesting that they were about 18,000 calories less than the Chinese take-out version.


Scallion Pancakes

2 eggs
3/4 cup water
1/2 cup all-purpose flour
1/2 cup sliced scallions
2 tsp vegetable oil

Dipping Sauce
1/4 cup soy sauce
1/4 cup rice wine vinegar
1 tsp sugar
1 tsp grated ginger
1/4 cup sliced scallions

1. Prepare dipping sauce by combining all ingredients and whisking together. Set aside.

2. In a large bowl, combine flour, water and eggs until smooth. Add scallions and stir.

3. Heat vegetable oil in a 10-inch nonstick skillet and heat over medium-high heat until shimmering. Add batter; cook 7-8 minutes. Flip and cook the other side for an additional 7-8 minutes.

4. Cut pancake in 8 wedges and serve with dipping sauce.

The Verdict: Don't throw away your take out menus quite yet.

While the pancakes were good, they weren't like the ones you get at a Chinese restaurant. They were quite eggy and spongy which is not how I think of a scallion pancake. My husband, who isn't a giant fan of Chinese food and therefore isn't as knowledgeable about the menu, thought they were just fine.

As I'd predicted while preparing them, they aren't much without the dipping sauce so make sure to accompany them with it.

Like the name implies, a scallion pancake is...well, a pancake. And everyone knows about the first pancake that it's your tester. You need to figure out what heat you need before you create something that's golden and fluffy. Unfortunately, with this recipe, you're making one. (In my case, I doubled the recipe and made two.) Err on the side of caution and flip around the 6 minute mark. Even if you feel like it isn't thoroughly cooked, you can always flip it again for another minute or two.

I served the pancakes with fried vegetable brown rice, a recipe you can find in this blog. I tried to make a link for you, but the link caused all kinds of formatting disasters. I write in this recipe that the best fried rice is made from at least day-old rice. Well, guess who forgot to make rice for tonight's dinner? If you guessed me, give yourself two points. If you find yourself in the same predicament, don't fret. Take this tip from chef Ming Tsai: make a batch of rice and freeze it for 25-30 minutes. (Incidentally, if you're going to cook with tofu as a meat substitute, do the same, though you may need to increase the freezing time. It changes the tofu's consistency from creamy to rough; giving it a meatier texture as well as a texture that your other ingredients more easily sticks to.)

Tuesday, November 9, 2010

Bacalao Guisado (Cod Fish Stew)


Well, if two weeks ago it was stew week and last week it was Mediterranean week, this week it's fake recipe week. What with yesterday's not-exactly-bolognese and today's bacalao-less bacalao.

This recipe for Bacalao Guisado isn't exactly fake. It's just that traditionally bacalao is made with salted, dried cod fish and I prefer to use fresh. You can use whichever you prefer, but don't forget that salted, dried cod fish needs to be soaked in water and rinsed well or else you're going to have salt stew.

Bacalao Guisado, or cod fish stew, is probably my favorite Puerto Rican food. But it's not just Puerto Rican; you can find recipes for something similar in Cuba, Portugal, Italy...the list goes on and on. It's a really easy recipe to make with fairly simple ingredients. If your supermarket carries Goya products, you can almost certainly find sofrito, a salsa-looking condiment that adds wonderful flavor to soups, stews, and beans. If you can't find sofrito, omit it and substitute it with some cilantro. It's not a true substitution, but it will help to give the stew an authentic flavor. The same holds true for the adobo, a seasoning. If you can't find it, substitute a half teaspoon each of salt and pepper.

Bacalao Guisado

1 to 1 1/2 lbs fresh cod fish
1 medium potato, cubed
1 medium onion, sliced
1 tbsp minced garlic
1/2 each red and green peppers, cut into strips
2 tbsp sofrito
6 oz tomato sauce
2 tbsp tomato paste
1 tsp Adobo with pepper
1 tbsp olive oil
10-12 green olives with pimentos
1 tsp capers
3/4 cup water

1. Barely cover potatoes with water and bring to a boil; cover and cook for 5 minutes until nearly soft. Drain and set aside.

2. In a large pot, heat olive oil over medium high heat. Add onion, and the red and green peppers and cook for 3-4 minutes until the onion becomes translucent. Add potato, garlic, sofrito, tomato sauce, tomato paste, adobo, olives, capers and water. Bring to a boil.

3. Meanwhile, cut cod fish into bite sized pieces and add to the pot when the stew comes to a boil. Turn the heat down to a simmer; cover and cook for 20 minutes or until fish is cooked through and the stew has thickened.

The Verdict: More please!

This is such a great, easy recipe. It also smells wonderful as it simmers because it's not just the heavy smell of cooking fish. I also love this recipe because in comparison to so many Puerto Rican dishes that are fried, this is simmered. It's also all fresh vegetables.

Speaking of vegetables, feel free to use whatever root vegetable you'd like with this stew. Yucca or cassava would not only be great, but very authentic. Since I had potatoes in my house (which I never do), I opted to use those up.

It's suggested to eat this dish with, or even over, white rice. But I didn't feel this was necessary because of the potato. A nice accompaniment, however, would be a fresh, crusty bread.

Monday, November 8, 2010

Vegetarian Polenta Pizza with "Bolognese"


Did you miss me?

Friday night was take out pizza and Saturday night was my birthday--and who wants to cook on their birthday? So I let someone else make me filet mignon, which was awesome. Sunday night I was going to post about making omelettes but thought you could figure out cracking eggs into a dish with salt and pepper, swirling the eggs around a hot pan, then filling the nearly-cooked eggs with filling.

But here I am again. It's Meatless Monday and I have been foaming at the mouth excited about trying this recipe for Vegetarian Polenta Pizza with "Bolognese" since last week. I found it in a Cuisine Light magazine cookbook that I'd picked up. I love polenta, especially grilled polenta. This recipe features a grilled polenta "crust", a vegetable-laden sauce, and topped with the lovely, nutty taste of fontina cheese. The whole thing is supposed to be made on a grill, but since I live in a second-floor condo and it's the beginning of November, I had to improvise. I also don't have a cast-iron skillet as the recipe calls for, so I'll direct you the way I made mine.

Vegetarian Polenta Pizza with "Bolognese"
For the Polenta
3 1/2 cups water
1/2 tsp salt
1 1/2 cups cornmeal or polenta
1 tsp dried thyme
1 tbsp olive oil

For the Bolognese Sauce
2 small carrots, peeled and quartered lengthwise
1 rib celery, halved lengthwise
1 small onion, peeled and cut into 1/4-inch-thick slices
2 Roma tomatoes, cored and halved
2 tsp olive oil
1/4 tsp each salt and pepper
2 tbsp dry red wine
2 oz. cream cheese, cubed
1 tbsp tomato paste
1 tbsp chopped garlic
1 cup shredded fontina cheese
1/3 cup grated Parmesan or Romano

1. Preheat broiler on high. Have one oven rack about 4 inches from the element; the other should be about mid-way in the oven. In a skillet, heat 2 teaspoons of olive oil until hot over medium-high heat. Add carrots, onion, celery and tomatoes and cook until soft, about 10 minutes. Meanwhile, bring the 3 1/2 cups of water to a boil with the salt.

2. Put the vegetables in a blender and process with the wine, cream cheese, tomato paste, garlic and salt and pepper. Puree until mostly smooth with no large chunks. Set aside.

3. When the water comes to a boil, slowly whisk in the polenta and thyme; stir constantly. Cook until thick and smooth, about 2 to 3 minutes.

4. Spray a glass pie plate with a cooking spray. Add the polenta and brush the top with 1 tablespoon of olive oil. Broil the top for 5 minutes until slightly brown and crisped. Turn off broiler and turn on the oven to 450 degrees. Place polenta on the other rack and cook for an additional 10 minutes.

5. Remove polenta from the oven and spread the sauce over the polenta; top with cheeses. Put the broiler back on high and broil the pizza until the cheeses are melted and golden.

The Verdict: It wasn't quite the amazing masterpiece I'd envisioned, but it was still really good. Seconds good.

One giant mistake I made was not having red wine on hand. I used white instead and my bolognese sauce looked more like...well, sorry to say this...vomit. Orangey-pink puree is not appetizing. That aside, it has a wonderful taste. As if you can now imagine it tasting wonderful.

Please be careful adding polenta to boiling water. It almost immediately becomes like molten lava, bubbling precariously in the saucepan. You may want to turn down your heat or even take the pot off the burner so that you don't get lobbed with a broken bubble of violently raging cornmeal.

The decision to call the sauce "bolognese" was rather dumb on Cuisine Light's part, even said quotationally. Bolognese is traditionally made with a lot of meat that's been cooked for so long it basically disintegrates. There's a lot of irony going on in saying vegetarian bolognese. By the way, I made the sauce about an hour before the rest of the meal. I also grated the fontina in advance. I love recipes you can do that with.

I can't really imagine making this all on a grill. There are Bobby Flays out there who can work magic over an open flame; I can hardly cook a hamburger. If you fall into the Flay category, heat up your grill and go crazy. Otherwise, make this in the comfort of your kitchen.

Amir ate it, but I don't think he's pining for leftovers. I would eat it again as would Noyan, but I don't think it's going to be a part of a frequently rotating repertoire.

Friday, November 5, 2010

Thai Twist Crock Pot Chicken


So I've had a can of coconut milk in my cupboard for what feels like an eternity. And being in a can, it would probably lasted another eternity. But I just thought it was time to clear out the pantry a bit, so when I came across this recipe, I decided to go for it. I haven't used my crock pot in eons (what's with these measures of time?), so I blew the dust off of it and got cookin'.

Thai Twist Crock Pot Chicken

Chicken breasts--as many as your family needs
Mushrooms, your favorite kind
1 can coconut milk
1 cup good white wine
1 tsp curry powder
1 can of your favorite "cream of" soup
1 can baby peas
1 can carrots
salt and pepper

1. If you prefer, brown the breasts first in a skillet. Otherwise, put chicken into the bottom of the crock pot.

2. Mix sauce in a large bowl: coconut milk, wine, curry powder and soup. Pour over chicken. Drain vegetables and add to the pot. Add mushrooms, salt and pepper.

3. "Turn on and walk away."

The Verdict: Hey! It tastes like...crock pot chicken!

There's a reason my crock pot hasn't been used in eons. This is a bit of a controversial remark among home cooks, but I for one hate my crock pot. I use it here and there and tend to go through crushes on it. Meaning, I'll use it for multiple meals in a row then forget about it again. But there are very few recipes during these phases that I make or find that truly bowl me over.

This recipe tasted fine but wasn't anything to write a letter to your nana about.

I got it off the Internet a while back and I'm not sure of the source. It was written just like it is above: incredibly nebulous. My favorite line is "turn on and walk away" which I put quotations around. I mean, I get that a crock pot is very "set it and forget it" as they say, but seriously? How about a ballpark? How many mushrooms? Eight? Eight cups?

It seems to me that the end result of many, many, many crock pot recipes is meat in a soup. Maybe if my family "needed" (as the author writes) more breasts than three, I'd have avoided a lot of the liquid. Maybe I should have used half cans of coconut milk and soup, then half a cup of wine. Or maybe, as usual, I was just destined to have enough liquid to have a second meal that I could pass off as Thai Twist Crock Pot Chicken Soup. Not that I did that.

The funniest part of the recipe was the bit about using a "good white wine," especially where it's immediately followed by "your favorite 'cream of' soup." Isn't that like putting truffles on a Banquet Chicken Pot Pie?

Anyway....no.

Wednesday, November 3, 2010

Meatball Kebabs


Ha ha ha ha.

I really am finding this tour of the Mediterranean uproariously funny, especially since I didn't plan it out that way. But here we are again, dining on kebabs with cucumbers and minty yogurt on the side. We'll be flying back home from our vacation to Santorini tomorrow. I promise.

These kebabs are very simple to make. The one ingredient that I just couldn't figure out what it was doing in a kebab was Chinese five-spice powder. No matter, it works and the smell is amazing.

I served the meatballs with sliced cucumbers and Greek yogurt with chopped mint.

Meatball Kebabs

1 lb ground beef
1/3 cup plain dry breadcrumbs
2 tbsp finely chopped onion
2 tbsp finely chopped fresh mint or parsley
1 tbsp garlic paste
1 tsp Chinese five-spice powder

1. In a large bowl, mix ground beef and all other ingredients together and add 1 tsp kosher salt. Shape into 24 1 1/2-inch-diameter meatballs. Thread onto wooden or metal skewers.

2. Brush a grill pan or griddle with some olive oil. Heat to medium and cook kebabs, turning often, until meatballs are browned all over, about 8 minutes.

The Verdict: Amir has found his dream meal. It was an amazing sight to behold.

The meatballs are great. They aren't particularly complex in taste, but flavors are just enough to make them delicious. Grilling them makes them slightly crunchy, searing the juices inside. I was a little worried that they'd be too dry to withhold cooking, but they did wonderfully.

I didn't have any garlic paste, so I just took a tablespoon of jarred minced garlic and attacked it with my mortar and pestle. I don't get to use it that often, but man, it's so much fun when I do.

I would highly recommend the cucumber and yogurt as sides. The coolness of the two foods are wonderfully complimentary to the spices in the meatballs. I just added chopped mint to our yogurt; I also think the harissa sauce from an earlier kebab (kofte) post would be delish. Noyan really liked the minted yogurt, though, and we both enjoyed watching Amir copy Daddy using it as a dipping sauce.

Greek Chicken with Capers, Raisins and Feta


Boy, when I get on a roll, I really run with it. Last week you were inundated with stew recipes, this week we're visiting the Mediterranean. It wasn't intentional. It must have been some subconscious craving for capers and lemons. Hopa! Or I guess if we're in Greece, opa!

Greek Chicken with Capers, Raisins, and Feta

4 (4-ounce) skinless, boneless chicken breast halves
2 tbsp all-purpose flour
1 tsp dried oregano
1 tbsp olive oil
1 cup thinly sliced onions
1 1/2 cups fat-free, low-sodium chicken broth
1/3 cup raisins
2 tbsp lemon juice
2 tbsp capers
1/4 cup crumbled feta cheese
4 thin lemon slices (optional)

1. Place each chicken breast half between 2 sheets of plastic wrap; flatter to 1/4-inch thickness using a meat mallet or rolling pin. Combine the flour and oregano in a shallow dish, dredge chicken in flour mixture.

2. Heat oil in a large nonstick skillet over medium-high heat. Add chicken, and cook for 4 minutes on each side. Remove chicken from pan, keep warm. Add onion to pan, sauté 2 minutes. Stir in broth, raisins, and juice; cook 3 minutes, scraping pan to loosen browned bits. Return chicken to pan. Cover, reduce heat, and simmer for 8 minutes or until chicken is done. Place chicken on individual plates, and keep warm. Stir capers into sauce and top each chicken breast with 1/3 cup sauce and 1 tablespoon cheese. Garnish with lemon slice, if desired.

The Verdict: Simple ingredients, complex taste. Yum!
Now, for whatever reason, my chicken breasts were not chicken breasts. They were ostrich breasts. Or maybe even pterodactyl breasts. I'm kidding, of course, but when those suckers got pounded out, I had to cut the breast in half again and ended up with six cutlets. Funny, because I was worried that I had three and not four chicken breasts to begin with. But the sauce was plentiful, so there was more than enough for my additional breasts.

The Cooking Light recipe calls for golden raisins, but c'mon, I have a 2-year-old. That means on any given day, I have a 75-pound vat of regular old raisins in my cupboard. I didn't think it made any difference. But cooked raisins, especially when sautéed in a sauce, are the best. They plump up and take on some of the flavors in the dish. And the raisins lend an almost Madeira taste.

The suggested side dishes for this dish were steamed zucchini and curried couscous, both of which I made. You can buy a pre-made package of curried couscous, or simply make some by adding a 1/2 teaspoon of curry powder and 1/4 teaspoon of allspice to the boiling liquid before adding the dry couscous. (And use a mixture of chicken broth and water rather than water alone; the taste is so much better.)

Tuesday, November 2, 2010

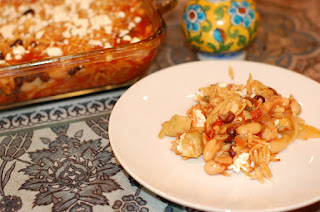
Baked Mediterranean Orzo


This has to be one of the worst written recipes I've ever made.

I'm not sure where the recipe originally comes from as I tore it out of somewhere. The directions were weird and the ingredient list and cooking instructions felt like they'd been translated from about four languages before finally making it into English. Not surprisingly, I changed quite a few things around and came up with this.

Baked Mediterranean Orzo

1 can (28-oz) whole tomatoes
2 cups vegetable or chicken broth
1 tbsp olive oil
1 large onion, cut into very thin slivers
1 can (15-oz) each black beans and cannellini
beans, drained and rinsed
1 can (15-oz) artichoke hearts, drained
1/2 cup dried apricots, cut into halves
1/2 cup raisins
1 tbsp capers, drained
1 1/2 tsp dried basil
1/2 tsp fennel seeds, crushed
1 1/2 cups orzo
1/2 cup crumbled feta cheese

1. Preheat oven to 450 degrees. Break up tomatoes with a spoon and drain liquid into another container. Add enough of the tomato liquid into the 2 cups of the vegetable stock to make 3 cups of liquid; set aside.

2. In a skillet, heat olive oil over medium-high heat. Add slivered onions and cook until golden. Add to the bottom of a 13"x9" casserole dish. Stir in tomatoes, broth mixture, black beans, cannellini beans, artichokes, apricots, raisins, capers, basil and fennel seeds. Put into the oven for approximately 20 minutes and bake until mixture comes to a rolling boil.

3. Carefully remove casserole from the oven and add orzo, scraping the bottom of the dish to loosen any brown bits. Cover tightly with tin foil, return to oven, and bake for 20 minutes more, or until pasta is tender and almost all the liquid has been absorbed. Remove from oven, sprinkle with cheese, cover, and let stand for 5 minutes before serving.

The Verdict: The apricots and raisins are the hands-down star of this dish.

This was my choice for meatless Monday and it was a great choice: both the orzo and beans made the recipe very filling. But like I just said, the apricots and raisins really make this dish pop with the sporadic sweet bites. It reminds me of a good salad, the way that each ingredient is separate but works together to create melodies of flavor.

Amir wasn't nuts about this dish, which really surprised me. He gobbled down handfuls of the dried fruit before dinner (but not too much to spoil his appetite), so I thought that would be a draw. And where he so likes rice, I figured he'd love the orzo. But no and no.

Yes votes from the parents, a thumb's down from the toddler.