Showing posts with label sides. Show all posts

Wednesday, February 2, 2011

Pasta Shells with Chickpeas and Hominy

Mollie Katzen is a great vegetarian cook and cookbook writer.  I've had her book Vegetable Heaven for years and have many recipes in it that are old standards, along with a few I'm not so fond of.  Actually, I've had the book for such a long time that looking through it the other day with fresh eyes made me see recipes I didn't even realize were there.  Like this one, which she called "Pasta Shells with Chickpeas and an Unexpected Ingredient."  I was intrigued.  The secret ingredient was...

...hominy.  Oh.

Well, that's fine.  There's nothing wrong with hominy.  I just was expecting something a little more interesting.  Or exotic.  But I like hominy; especially the way that it tastes and even looks a bit like hard, wet popcorn.  So we gave it a go for Meatless Monday.

Pasta Shells with Chickpeas and Hominy

1 (15-oz) can chickpeas, rinsed and drained
1 (15-oz) can white or yellow hominy, rinsed and drained
3 tbsp extra virgin olive oil
1 tbsp minced garlic
4 tbsp balsamic vinegar
1 tsp salt
1/2 tsp dried thyme
1/2 tsp dried oregano
1/2 lb fresh mozzarella cheese, cut into small cubes
3/4 lb medium-sized (1-inch) pasta shells
1/4 cup grated parmesan or pecorino cheese
Coarsely chopped flat-leaf parsley
Freshly ground pepper

1.  Combine chickpeas, hominy, olive oil, garlic, balsamic vinegar, salt, herbs, and mozzarella in a large bowl.  Stir, cover tightly, and let stand at room temperature.  Marinade for up to 8 hours.

2.  Cook the pasta in plenty of boiling water until it is tender.  Drain thoroughly, and add it to the chickpea mixture in the bowl.  Toss well from the bottom, sprinkling grated cheese and chopped parsley as you go.  Grind in a generous amount of black pepper, and serve hot, warm, or at room temperature. 

The Verdict:  Good, but I'd rather it be a side than the main event.

The herbs and vinegar are what make this recipe.  While pasta, chickpeas, hominy and mozzarella all taste good, none of them are highly flavorful foods.  They seem to be a blend of different blands.  In some ways, they work better standing alone as their mellow tastes don't stand out too much when competing with one another.

Hominy was not a hit with my son.  He wanted to try it as soon as I opened the can because, I'm sure, it looks like a fun food.  Almost like a can of tiny snowballs.  But whatever he was imagining it would taste like, it didn't.  He chewed, made a perplexed face, then immediately spit it out in dramatic toddler fashion.  I guess to him it was the "unexpected ingredient" to which Mollie Katzen refers--unexpectedly disgusting.

I think this dish would be great to bring along to a barbecue.  Which, I sheepishly admit, means bringing it to sit along side a big, juicy burger.  Ironic, as it was my Meatless Monday choice.  But it just doesn't have enough going on for me to be a main course.

Just as an aside, I used tri-color shells.  I mention this because the photo looks like a bowl of pasta salad with orange peels.  That's tomato pasta shells.  Boy, wouldn't it be nice to have a professional food photographer to go along with this blog?  My husband would love that, as he already complains that every dinnertime is like a CSI: Kitchen episode with all the flashbulbs.

Monday, January 24, 2011

Maple-Glazed Chicken with Apple-Brussels Sprout Slaw

I was looking for a chicken recipe when I came across this one in my pile.  I guess maple made me think winter which gave me a warm and cozy feeling.  And my son loves cole slaw and I love Brussels sprouts, and we all love apples, so I thought this Cooking Light recipe might be a win-win.

Maple-Glazed Chicken with Apple-Brussels Sprout Slaw

8 (2-oz) chicken cutlets
1/2 tsp kosher salt, divided
1/2 tsp freshly ground black pepper, divided
2 tbsp olive oil, divided
3 tbsp red wine vinegar, divided
2 tbsp maple syrup
8 oz Brussels sprouts
1/4 cup dried currants (I used raisins)
1 medium Fuji or Gala apple, cut into 1/8-inch-thick slices

1.  Heat a large skillet over medium-high heat.  Sprinkle chicken with 1/4 teaspoon salt and 1/4 teaspoon pepper.  Add 1 tablespoon oil to pan; swirl to coat.  Add chicken to pan; cook 3 minutes on each side or until done.  Remove from pan; keep warm.  Add 2 tablespoons vinegar and syrup to pan; bring to a boil.  Cook 1 minute or until reduced to 3 tablespoons.  Return chicken to pan; turn to coat with glaze.

2.  Cut Brussels sprouts in half length-wise; thinly slice crosswise.  Place remaining 1 tablespoon oil, 1 tablespoon vinegar, 1/4 teaspoon salt, and 1/4 teaspoon pepper in a large bowl and whisk together.  Add Brussels sprouts, currants, and apple; toss to combine.  Serve slaw with chicken.

The Verdict:  This is one of those recipes that tastes and looks like it was really hard to make, when in fact you can whip it up in record time.  Score!

Everyone really loved the chicken.  It has a great flavor that's not too sweet.  Honestly, I made more glaze than was suggested in the recipe.  I wanted my chicken slightly gooey.  The slaw was, in my opinion, amazing.  The dressing was simultaneously sweet and tart and the mix of sprouts, apples and (in my slaw) raisins was a fantastic mix of flavors and textures.  But the slaw was also a bit like Goldilocks and the Three Bears: Mama Bear thought it was wonderful, Papa Bear thought it was OK but isn't a raving fan of Brussels sprouts and Baby Bear wanted to know what the hell you smeared all over my apples and raisins?  And what are these bitter green things?

So if you're feeding a table of picky eaters, you might want to skip the slaw.  (Sniff, sniff.)  But the chicken was a hit. 

Saturday, December 25, 2010

Héloïse's Apples and Squash

Who's Héloïse? I don't really know; a friend of cookbook/memoir author Susan Herrman Loomis who shared her recipe for apples and squash (or in French les pommes et potimarron) and ended up in Loomis's book On Rue Tatin. The recipe is a combination of sautéd apples, smothered in a squash and béchamel sauce mixture, which is then baked until golden. Sounded like a delicious and special accompaniment to the mussels I made for Christmas Eve.

Héloïse's Apples and Squash

3 kuri or acorn squash (3.5 lbs) trimmed, peeled,
seeds removed and cut into 2" pieces
1 tbsp unsalted butter
1 3/4 lbs cooking apples cored, peeled, and cut into eighths

(for Béchamel)
1 1/2 cups whole milk
2 bay leaves
3 tbsp unsalted butter
2 tbsp flour
salt and pepper
nutmeg

1. Preheat oven to 425 degrees F. Grease a 9 x 13 x 2" dish.

2. Cook squash (boil or roast), purée, drain if necessary.

3. Melt butter in a skillet and add apples. Cook until golden and tender, about 15 minutes. Transfer to the baking dish.

4. To make the béchamel, scald milk with the bay leaves over medium heat in a small saucepan. Remove from heat and infuse for 10 minutes. Melt 2 tbsp butter in a small sauce pan over medium heat. Whisk in flour and cook until mixture has bubbled and formed pale yellow foam, about 2 minutes. Pour in hot milk, remove bay leaves, whisking as you add to the flour-butter mixture. Cook until thickened like heavy cream. Season with salt and pepper.

5. Whisk béchamel into squash.

6. Pour squash béchamel over apples, dot with remaining butter, season with nutmeg. Bake until béchamel is golden, apples tender, about 25 minutes. Let cool for 10 minutes before serving.

The Verdict: My husband and son loved it. I liked it, but I think I was a little let down after all that work.

The squash and apples make a perfect pair and the béchamel adds a wonderful creamy quality to the dish. But honestly, apples, squash and even béchamel are rather mild foods. For me, it lacked a flavor punch that I can't put my finger on. Don't get me wrong: it was delicious. But I think I was expecting a little more.

The squash can be made in advance. And boy, am I glad that I did as I was very busy in the kitchen last night. This is one of those recipes that, in an almost French tradition, create loads of dishes. It's a good idea to have a sink full of hot, soapy water on hand or else an empty dishwasher to load as you go. Otherwise, in addition to all that time you take to cook, you get to spend a long time cleaning, too.

Loomis wrote that her family enjoys the leftovers of this dish slightly warmed for breakfast. I can see this as being a lovely breakfast; rich and filling. Unfortunately for us, we also have a ton of leftover jam and bread pudding from Christmas morning. Well, maybe not so unfortunate. That's another great recipe you'll have to stay tuned for.

Sunday, November 14, 2010

Braised Radishes and Paprika Oven Fries


Since I'll be attempting the national dish of Brazil later in the week, I need chicken meat. So dinner is Julia Child's poulet rôti, a recipe I shared a while back. But rather than leave everyone hanging...what else did the Kinaymans eat this weekend?...I'm sharing two sides: one is an old favorite of mine, the other is a new attempt. (You do worry about things like global warming, the economy and what my family eats on a regular basis, right?)
The old favorite is braised radishes. I ate a lot of radishes growing up, fresh from my neighbor's garden, sliced and in a green salad. I never particularly cared for their spicy flavor because that's all they had going for them: heat. I had no idea that you can actually cook with them until I saw Rachael Ray braising some on an episode of 30 Minute Meals. Suddenly, one-dimensional radishes took a turn.
The other recipe looked simple and consisted of everything I had on hand. Paprika oven fries are seasoned potatoes slow roasted in the oven.
Braised Radishes

2 bunches radishes, about 1 pound, trimmed of tops and roots
1 1/2 cups chicken stock
2 tbsp butter, cut into bits
1 large shallot, thinly sliced
2 tbsp sugar
1 tbsp red wine vinegar
salt and pepper

1. Place radishes in a skillet with stock, butter bits, shallots, sugar, vinegar, salt and pepper. Cover the pan and reduce heat to medium. Cook radishes 10 to 12 minutes and if the stock has not cooked away, remove radishes and cook down to 1/2 cup, about 2 minutes.


Paprika Oven Fries

3 large potatoes
3 tbsp canola oil
2 tsp paprika
salt and pepper

1. Preheat oven to 450 degrees. Cut potatoes into 1-inch-wide wedges. Transfer to a rimmed baking sheet, toss potatoes with oil, paprika, salt and pepper.

2. Bake potatoes in a single layer, cut side down, until they loosen easily from the sheet, about 25 minutes. Turn the potatoes, continue to bake them until fork-tender and crisp, 25-30 minutes more.

The Verdict: A different response to each vegetable.
Let's start with the radishes. I love these radishes. When cooked, radishes take on a cruciferous vegetable taste, very much like brussel sprouts. To many, that statement right there is a deal-breaker. But if you like those vegetables, you'll like this dish. (Oh, and by the way, I just looked it up: radishes are, indeed, a cruciferous vegetable themselves. Who knew? Not me. Learned something new today.)

The braising making the radishes lose a lot of their horseradish-like punch. Interestingly, braising them also makes them lose almost all of their red coloring. The liquid has a hint of sweet and was a great accompaniment to the roasted chicken, working well in lieu of a gravy.

I don't think my husband and son agree. My husband ate two and my son felt duped after gleefully shouting, "I want grapes, Daddy!" Nothing like a grape, honey.

The potatoes on the other hand turned the tables. Both husband and son ate those happily, while I munched on them dutifully. Honestly, I had to divide up the cooking time to allow for a family walk then the cooking of the chicken. They came out more like kettle chips which I don't think was supposed to happen. Maybe the difference of opinion was because I was expecting a steak fry while they didn't know what to expect.

The flavor was good; I would just caution that they can dry out. I don't think my wedges were quite 1-inch thick, so be warned that more meager cuts might lead to crispier potatoes.

Saturday, November 13, 2010

Mashed White Beans

This is the side I served with the Mini Skillet Meatloaves. It's four ingredients (aside from salt, pepper and water) and takes about 10 minutes to make. The kind of recipe I like--good food, easy to prepare.

Mashed White Beans

1 tbsp olive oil
2 minced garlic cloves
2 cans cannellini beans, rinsed and drained
1 tsp dried sage
1 cup water
salt and pepper

1. Heat olive oil over medium heat. Add garlic and cook until golden and fragrant, about 1 minute.

2. Increase the heat to medium-high. Add beans, sage and water. Cook, stirring often, until beans are hot and the liquid thickens, about 5 t0 7 minutes.

3. Mash beans, leaving some whole. Season with salt and pepper.

The Verdict: Super easy, super tasty. Even the toddler ate some.

This reminds me of an Italian version of refried beans. Cannellini beans are very flavorful, so simply adding sage, salt and pepper is perfect.

The original recipe calls for 1 1/4 cups of water. I found that before I mashed my beans, I took out nearly a cup of liquid. I'll have to make this recipe again to figure out the right amount of water to add; it might be more like 3/4 cup. If you think appears soupy, take out some of the liquid. But don't leave the beans dry; you need the liquid to mash them.

This side compliments lots of foods. And it was so easy, I think this might become a staple side dish.

Wednesday, November 3, 2010

Greek Chicken with Capers, Raisins and Feta


Boy, when I get on a roll, I really run with it. Last week you were inundated with stew recipes, this week we're visiting the Mediterranean. It wasn't intentional. It must have been some subconscious craving for capers and lemons. Hopa! Or I guess if we're in Greece, opa!

Greek Chicken with Capers, Raisins, and Feta

4 (4-ounce) skinless, boneless chicken breast halves
2 tbsp all-purpose flour
1 tsp dried oregano
1 tbsp olive oil
1 cup thinly sliced onions
1 1/2 cups fat-free, low-sodium chicken broth
1/3 cup raisins
2 tbsp lemon juice
2 tbsp capers
1/4 cup crumbled feta cheese
4 thin lemon slices (optional)

1. Place each chicken breast half between 2 sheets of plastic wrap; flatter to 1/4-inch thickness using a meat mallet or rolling pin. Combine the flour and oregano in a shallow dish, dredge chicken in flour mixture.

2. Heat oil in a large nonstick skillet over medium-high heat. Add chicken, and cook for 4 minutes on each side. Remove chicken from pan, keep warm. Add onion to pan, sauté 2 minutes. Stir in broth, raisins, and juice; cook 3 minutes, scraping pan to loosen browned bits. Return chicken to pan. Cover, reduce heat, and simmer for 8 minutes or until chicken is done. Place chicken on individual plates, and keep warm. Stir capers into sauce and top each chicken breast with 1/3 cup sauce and 1 tablespoon cheese. Garnish with lemon slice, if desired.

The Verdict: Simple ingredients, complex taste. Yum!
Now, for whatever reason, my chicken breasts were not chicken breasts. They were ostrich breasts. Or maybe even pterodactyl breasts. I'm kidding, of course, but when those suckers got pounded out, I had to cut the breast in half again and ended up with six cutlets. Funny, because I was worried that I had three and not four chicken breasts to begin with. But the sauce was plentiful, so there was more than enough for my additional breasts.

The Cooking Light recipe calls for golden raisins, but c'mon, I have a 2-year-old. That means on any given day, I have a 75-pound vat of regular old raisins in my cupboard. I didn't think it made any difference. But cooked raisins, especially when sautéed in a sauce, are the best. They plump up and take on some of the flavors in the dish. And the raisins lend an almost Madeira taste.

The suggested side dishes for this dish were steamed zucchini and curried couscous, both of which I made. You can buy a pre-made package of curried couscous, or simply make some by adding a 1/2 teaspoon of curry powder and 1/4 teaspoon of allspice to the boiling liquid before adding the dry couscous. (And use a mixture of chicken broth and water rather than water alone; the taste is so much better.)

Tuesday, October 19, 2010

Carottes Glacées (Glazed Carrots)


What do you get when you have a bag of carrots, a stick of butter, and a bunch of time to cook them? Um, let's try pure heaven. Otherwise, you'd call it a French classic à la Julia.

Carottes Glacées (Glazed Carrots)

1 1/2 lbs carrots, peeled, quartered and cut into 2-inch lengths
1 1/2 cups chicken stock
2 tbp granulated sugar
pinch of pepper
6 tbsp butter
2 tbsp very finely minced parsley, or 1 tbsp dried parsley


1. Boil the carrots slowly in a covered saucepan with the stock, sugar, pepper and butter for 30 to 40 minutes until the carrots are tender and the liquid has reduced to a syrupy glaze.


2. Serve on a hot dish and sprinkle with parsley.


The Verdict: Although half asleep, Amir ate these by the fistful. I wasn't asleep but ate them by the fistful as well.

OK, OK--that's a lot of butter for a bunch of carrots. But the syrup over an already sweet vegetable is amazing. They just melt in your mouth.

By the way, the whole bit about 2" quartered carrots? Or the part about the hot dish? Yeahhhh right. Great idea that makes me imagine duly impressed dinner guests, but since I was just feeding the Kinaymans on a Friday night, it was bagged, peeled, and cut baby carrots served in a porcelain dish. Try these carrots. You could serve them on a paper plate and you'll still hear angels singing.


Monday, October 4, 2010

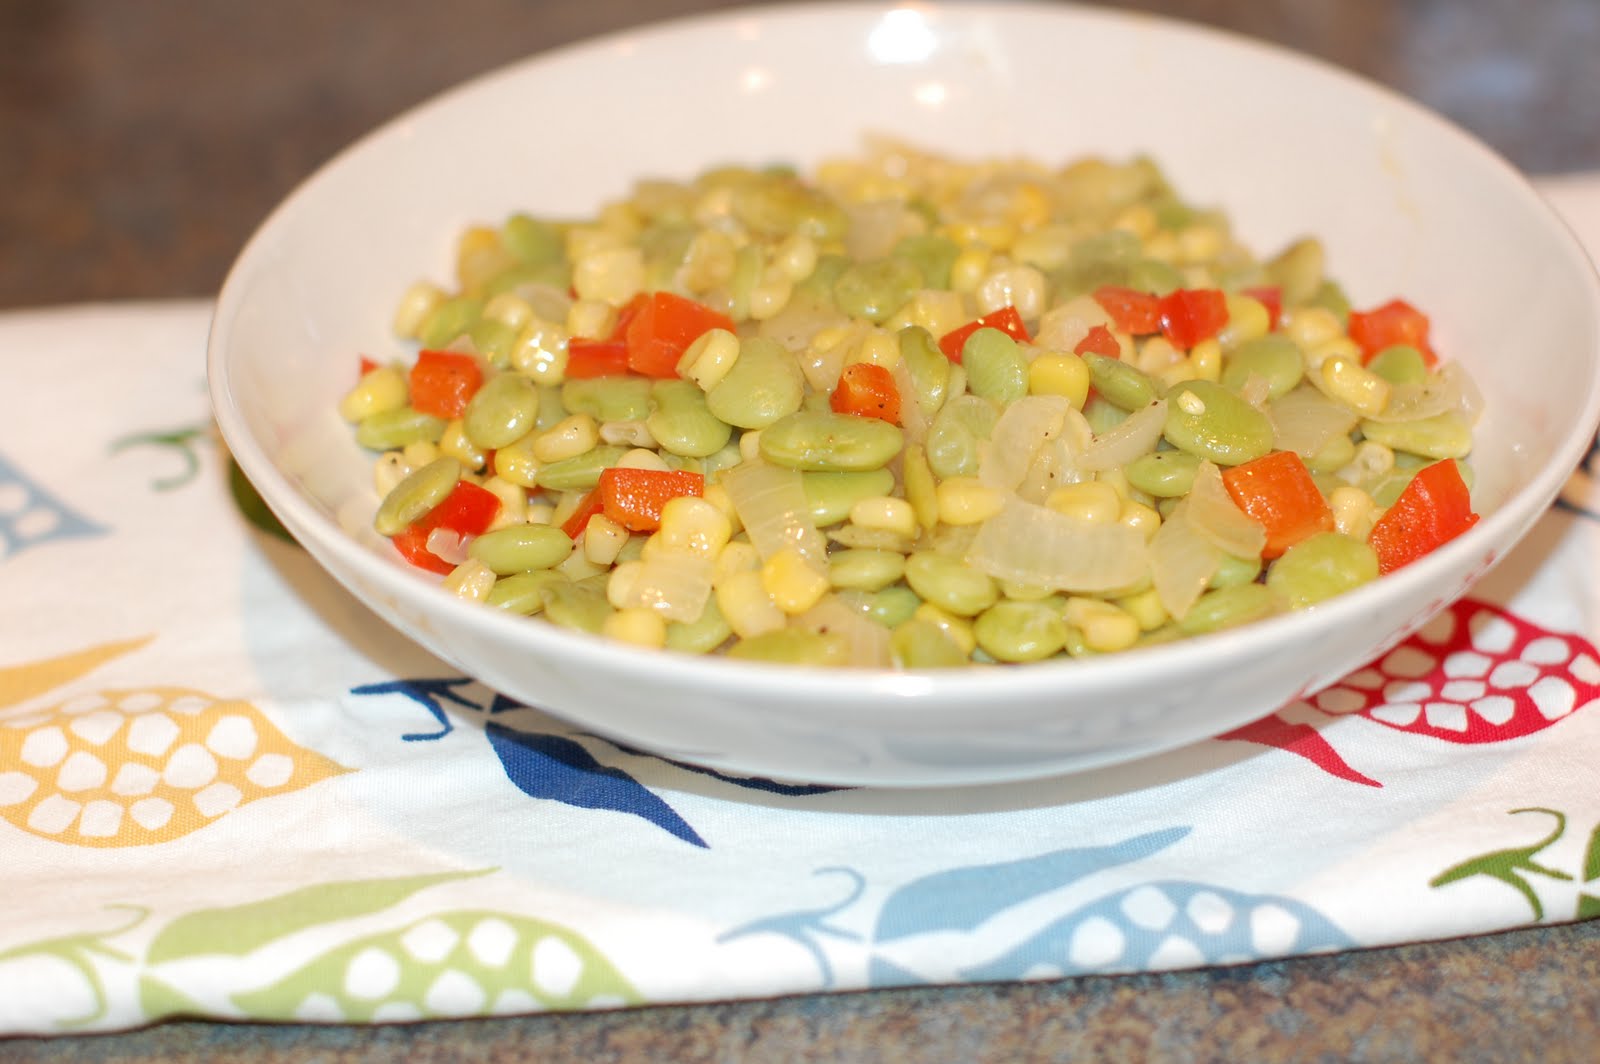
Succotash


"Sufferin' Succotash!" That's pretty much my familiarity with succotash; the exclamation of a cartoon cat. Hey, I grew up in Massachusetts. But since Paula Deen suggested it as the accompaniment to Salisbury steak, I figured I'd have a go at it. Yes, it has lima beans it in. And no, I don't particularly like lima beans. But I'm a grown up and tastes change.

Succotash

1 tbsp olive oil
1 cup chopped onion
1/2 cup chopped red bell pepper
1 (14-ounce) package frozen baby lima beans, thawed
2 tbsp butter
1 tbsp water
1 (12-ounce) package of frozen gold and white corn

In a large skillet, heat oil over medium heat. Add onion, bell pepper, salt and pepper; sauté for 4 to 5 minutes or just until vegetables are tender. Add lima beans, butter, and water; cook for 5 minutes, stirring often. Add corn, and cook 10 to 12 minutes, stirring often, or until beans and corn are tender. Serve immediately or at room temperature.


The Verdict: Lima beans taste like a drier edamame and I like edamame. So I like succotash.

Noyan liked it as well; it was the first thing on his dish that he tucked into. Amir, however, gave it the evil eye and (as you maybe read in the last post) used all of his energy attacking the Salisbury steak like a bird of prey.
In reading up about succotash, apparently there are two versions: this, with corn (and, oh, by the way...the original recipe calls for frozen gold and white corn--I just used corn) or with hominy. And, interestingly, succotash is an Native American word that means "boiled whole kernels of corn." So it sounds to me like the hominy version is the truer recipe, and according to some cooks, the better. Slow-cooked hominy brings out more flavor.

Not sure, folks, but I can say two things. First, I liked this recipe, and second, there was enough to freeze and eat again. So I'll have to report on hominy succotash in a future post.

Saturday, October 2, 2010

Pommes de Terre Sautée or Pan Fried Potatoes

These are the potatoes that went with the roast chicken from last night, or part two of freaking fussy French food. The recipe that appears in Mastering the Art of French Cooking describes the superior potatoes you'd get if you were living in France, potatoes that are just the absolute perfect shape and size for dancing around merrily in a pan. We, of course, don't have these potatoes here in the United States. So Julia suggests whittling down a bunch of new potatoes into 2 inch long by 1 inch wide olive-shaped to masquerade as pommes de terre de Hollande.

I was just going to cut my potatoes into cubes and not bother to even peel them. But authenticity got the better of me, so I spent a good amount of time peeling small potatoes, cutting them in two, then carving them down into a new shape.

Pommes de Terre Sautée or Pan Fried Potatoes

2 lbs new potatoes
2 tbsp butter
1 tbsp olive oil
1/4 tsp salt

1. Cut potatoes into 2" x 1" olive shapes. Dry well with a paper towel.

2. In a skillet with a cover, add butter and oil to skillet to film it by 1/16 inch and set over moderately high heat. When butter is very hot but not turning color, put potatoes into skillet. Leave them for 2 minutes, regulating heat so butter is always hot but not coloring. then shake the skillet back and forth to roll the potatoes and to sear them on another side for 2 minutes. Continue thus for 4 to 5 minutes more until the potatoes are a pale golden color all over, indicating that a seared, protective film has formed over them, so that they will not stick to the pan. Then sprinkle the potatoes with salt and roll them again in the skillet.

3. Lower heat, cover the skillet, and cook the potatoes for about 15 minutes, shaking them every 3 to 4 minutes to prevent their sticking to the skillet, and to insure even coloring. They are done when you can pierce them with a fork.

4. Sprinkle potatoes with minced parsley, chives, fresh tarragon or a mixture of fresh green herbs.

The Verdict: I hate to admit it, but the extra effort was worth it. These potatoes are delicious.

The wood-working skills you employ to shape the potato really does allow for all-over browning; almost like a gigantic homefry. The recipe suggests more butter at the end of cooking but I say don't; you're using plenty to cook them. Also, I didn't have any fresh herbs, so I sprinkled mine with about a 2 teaspoons of Herbes de Provence.

These potatoes probably aren't for your average weekday meal side dish. It's too much effort. But if you're planning a go-all-out meal, dig out this recipe. They're definitely impressive.

Friday, September 24, 2010

Barbecue Chicken Meatballs


I guess it was a week heavy on ground chicken. Imagine my joy to walk into Whole Foods for a few staples the other day to see a "Special: $2.99/lb Ground Turkey" sign. Oh well, c'est la vie.


This recipe comes from the now discontinued Cookie magazine. In addition to great parenting articles, they had some really fun, fast and kid-friendly recipes. I've made this a number of times and have even made extras to freeze. The side dish pictured is red kuri squash, my new favorite type of winter squash. It's a very mild squash that tastes something like a cross between a yam and a chestnut. I highly recommend it. Here it's just split with the inside smeared with butter, maple syrup and sage then cooked for approximately 40 minutes in a 400 degree oven.


Barbecue Chicken Meatballs


1 lb ground chicken

2/3 cup bread crumbs

1 egg

1 tsp chili powder

1 small onion, grated and drained

1/2 tsp paprika

1 tsp kosher salt

2 tbsp applesauce

2 tbsp olive oil

1 cup barbecue sauce


1. Combine the first 8 ingredients. Form the mixture into 1-inch balls.

2. Place the oil in a wide frying pan. Add the meatballs and brown them on all sides until cooked through, 8 to 10 minutes.

3. Add the barbecue sauce. Cook until it reduces and stick to the meatballs, about 1 minute. Serve.


The Verdict: Well, if Amir has anything to say about it, it's a smashing success. I put three meatballs on his plate, however, he ultimately ate 5. Wow! Noyan wasn't at dinner to comment, but said he liked it in his lunch today. (This is the barbecue sauce from the previous recipe, so hmmm...)


Really easy to make, quick to cook. What mother isn't into that?

Wednesday, September 8, 2010

Instant Teriyaki Chicken and Vegetable Brown Rice

In the most recent issue of Prevention magazine there's an article with short suggestions on how to create less stress and more happiness in your life. One of the tips was to have a tried-and-true quick and easy meal in your arsenal. Keep the ingredients on hand and be able to create it in a short amount of time. I'll bet they'd be pretty excited to know that one of my go-to meals is from their very own magazine.

The recipe is a 5-ingredient Instant Teriyaki Chicken. Most people have the ingredients in their cupboards right now. To go with it, I made Fried Vegetable Brown Rice, which is more than likely also ingredients you have in your kitchen, too.

Chinese food is one of my favorites. I'd get Chinese take out at least once a week, but unfortunately, my husband is not a big fan. It's not so much the food itself but the restaurants. The majority of Chinese places are what he calls a "sticky" restaurant. You know when you go into a small place that fries a lot of its food? Years of grease accumulation starts to find it's way onto the tables, chairs and walls. It's not full-0n dirty; the place won't get shut down by the Board of Health. But it's never going to get a Michelin star, either. That's a sticky place and my husband is not a fan. So to make decent take out at home, which is also much healthier, is right up my alley.


Instant Teriyaki Chicken


2 tbsp soy sauce

1 1/2 tbsp honey

1 tbsp tomato paste

4 bone-in, skinless chicken thighs

1 tsp toasted sesame seeds (optional)


1. Heat the oven broiler to high. Put soy sauce, honey and tomato paste in medium bowl and stir together.

2. Add chicken and turn to coat all surfaces.

3. Put chicken in an ovenproof pan under the broiler.

4. Cook chicken until well browned, about 10 minutes. Flip and brown the second side until cooked through, about 4 minutes. Sprinkle with sesame seeds (if using).
A nice part of this recipe is that you can get your toddler in on the action. Instead of putting the chicken into the sauce, I put the sauce on the chicken with a pastry brush. Amir really loves this job. In addition, I put the sesame seeds on before I cook the chicken which is another fun toddler cooking opportunity.

Another option is to use boneless and skinless chicken thighs. This recipe turned me onto chicken thighs in general. Who knew that a cut of chicken could be so cheap and tasty? This is especially advantageous when buying organic and free range chicken, which is pricier than regular chicken--but in my opinion, worth the extra money.


Vegetable Fried Brown Rice

4 cups cooked, cold brown rice
3 tbsp vegetable oil
1 medium onion, finely chopped
1 cup carrots, finely chopped
1 cup frozen peas, thawed
2 eggs, beaten
5 tbsp soy sauce

1. Place a wok over medium-high heat and add one tablespoon of the vegetable oil. Cook onion and carrots until slightly browned, around 10 minutes. Remove from heat. Meanwhile, thaw peas. Drain and set aside.

2. Add the second tablespoon of oil then the two beaten eggs. Cook through and remove from heat; chopping the egg into rough bits.

3. Add the final tablespoon of oil into the wok and add the rice. Stir-fry for about two minutes, adding the soy sauce. Add more or less, depending on your taste.

4. Return all ingredients to the wok. Stir together and serve immediately.

The key to good fried rice is using old rice. Sounds weird, but make sure that you cooked the rice a day in advance. It's even OK to use rice that is two or three days old. Great recipe for leftover rice; it's also good if you're cooking rice for one dish to make extra to make this one later in the week. With four cups of rice, it makes quite a few main dish portions. As a side, you've got plenty for lunch for the days to come.

The Verdict: Loved it. Everyone cleaned their plate.

Wednesday, August 25, 2010

Marinated salmon and cole slaw

Wednesday night dinner was a family favorite. Salmon filets seasoned in a simple marinade with almost homemade coleslaw. I find it really funny that my 2-year-old likes this meal so much as I don't think of salmon or cabbage as toddler-friendly. But it's as successful as packaged macaroni and cheese.

The salmon was frozen packs from Whole Foods. I often find that frozen salmon is a little too gamey for my taste, but these were fantastic--firm texture and not an overpowering taste. The cole slaw is the bagged Dole shredded cabbage and carrot mixture. A bit of a cheat, but still fresh and tasty.

Marinated Salmon

4 salmon filets, about 3 oz. each
1/2 cup soy sauce
1 tablespoon crushed garlic
1 tablespoon jarred minced garlic (I like Ginger People brand)
2 tablespoons olive oil
2 tablespoons white wine
cooking spray

Marinade the salmon for at least an hour. Once marinated, transfer to a baking dish that's been sprayed with cooking spray. Cook at 375 for approximately 15 minutes, or until the fish is cooked through.

Cole Slaw

1 bag of prepared cole slaw mix
1/2 cup Light Miracle Whip
2 tablespoons red wine vinegar
3 tablespoons milk
2 tablespoons granulated sugar
celery seed

Mix all ingredients in a large serving bowl. Put as much celery seed as desired...if desired at all. Lots of people don't like the strong flavor of celery. Chill for 30 minutes if you have the time; otherwise, it can be brought to the table straight-away. Just remember to refrigerate leftovers.

The verdict? Five stars and two thumbs up. But maybe my family is just weird.